Autorize
Autorize is Caido's official authorization/access control vulnerability testing plugin.
In this tutorial you will learn how to configure the plugin to conduct both passive and active scanning.
INFO
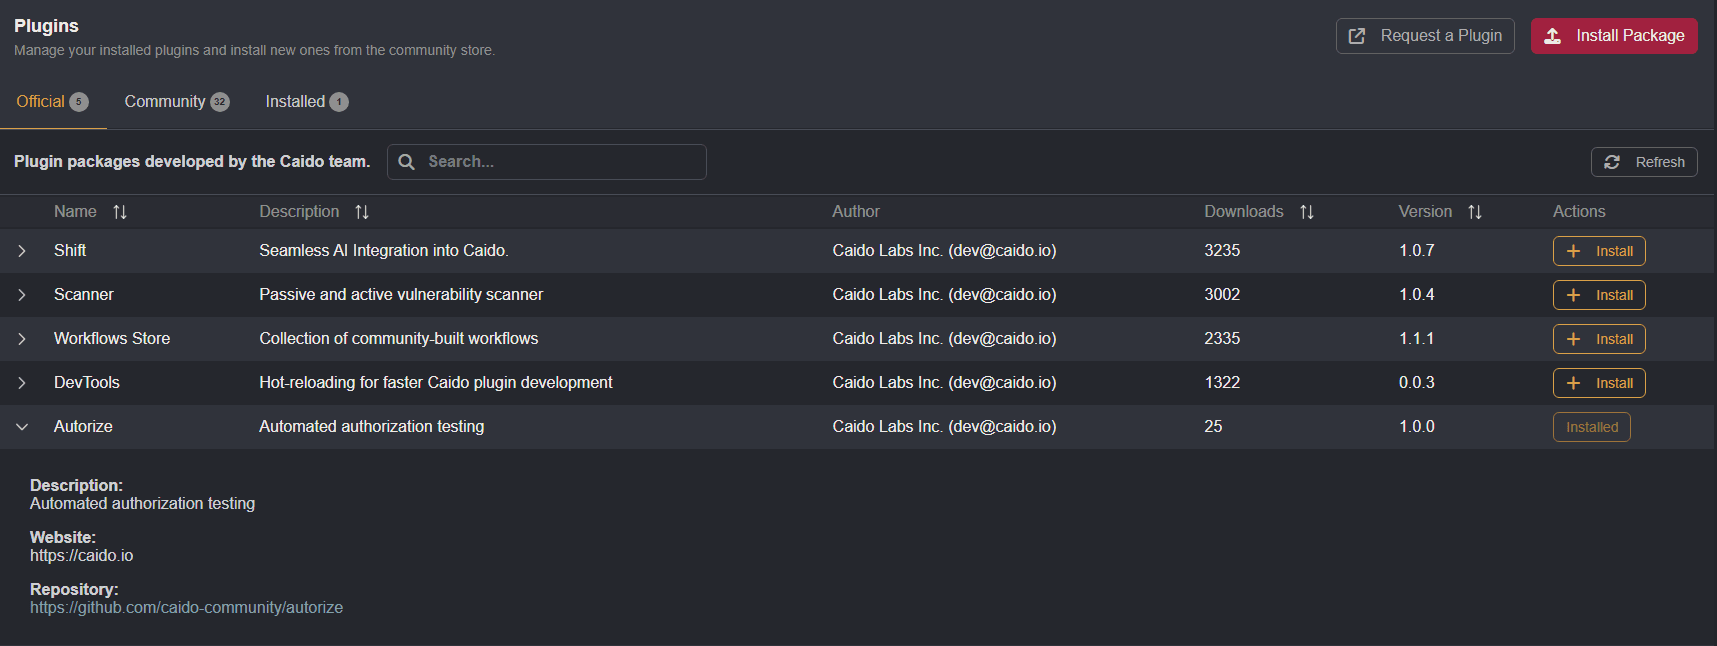
Autorize is available for installation in the Official tab of the Plugin interface.
Autorize creates templates for proxied requests that are modified to simulate requests sent by users with three different permission levels. The three requests sent for each template are the:
Baseline Request: This request is the original, high-privilege user request.Mutated Request: This request is modified to replace the baseline request with the credentials of a lower-privilege user.No-Auth Request: This request is stripped of all authentication headers.
By comparing the corresponding responses of these requests to each other, Autorize is able to determine if low-privilege or unauthenticated users are able to access the same resources or functionality available to the high-privilege user.
Autorize IDOR Testing Lab Walkthrough
🧪 CAIDO LABS
Learn how to use this feature in hands-on, simulated training environments: Autorize IDOR Testing Lab
The Autorize IDOR Testing Lab features registered accounts for two users: John and Bob.
By designating John as the low-privilege user and Bob as the high-privilege user, we will use Autorize passively test for authorization vulnerabilities against API endpoints that return sensitive account data based on the user_id query parameter:
/autorize.php?action=profile&user_id={id}/autorize.php?action=orders&user_id={id}/autorize.php?action=messages&user_id={id}/autorize.php?action=settings&user_id={id}
- With your proxy settings enabled, navigate to https://labs.cai.do/autorize.php in your browser and click on the
Get John's Tokenbutton to authenticate as John. - Under the authenticated session, clicking on the
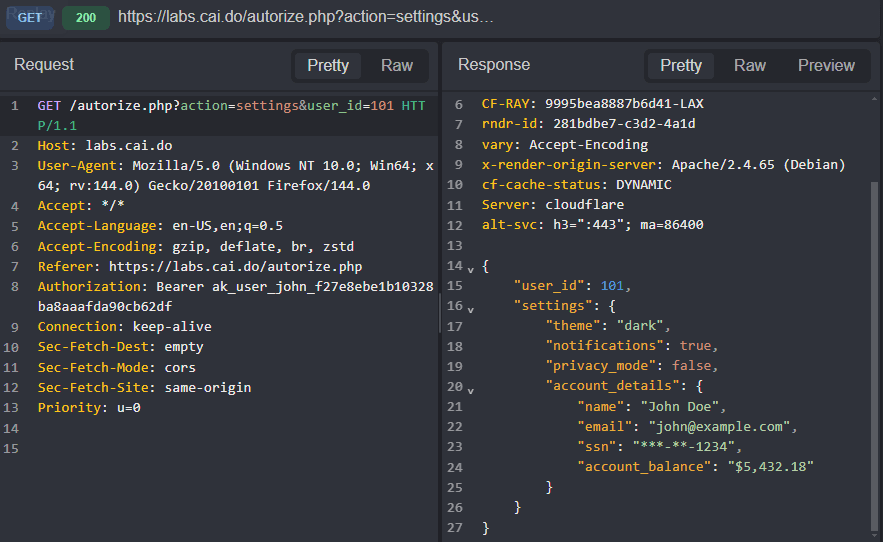
Get Profile,Get Orders,Get Messages, andGet Settingsbuttons return John's sensitive data. Notice that theuser_idassigned to John's account is101.
Mutations
The modifications to each request are referred to as "mutations" and are applied to configuration profiles that represent the three template requests:
Mutated: The low-privilege user request.No Auth: The unauthenticated user request.Baseline: The original high-privilege user request.
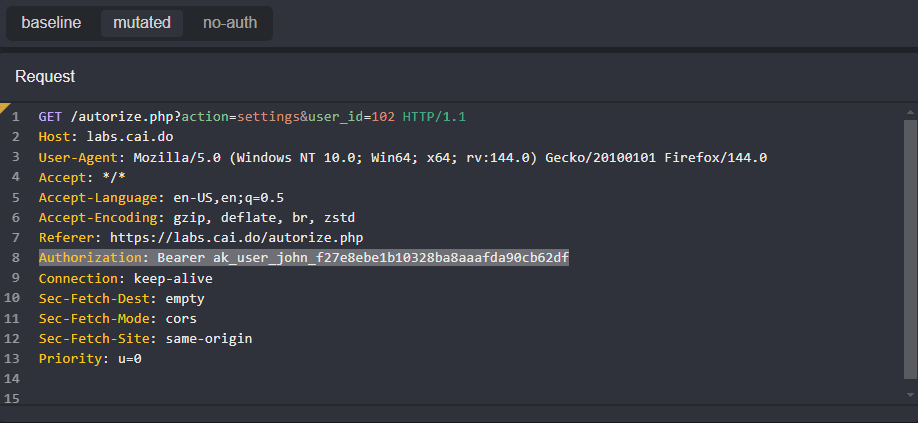
The mutation that will apply John's low-privilege session token to the high-privilege baseline requests sent by Bob can be configured either manually or via a context-menu shortcut.
Manual Configuration
To set the mutation for the low-privilege Mutated profile manually:
Copy the value of John's session token from the
tokenparameter in the response to the/autorize.php?action=loginPOST request or from theAuthorizationheader of subsequent API calls.Navigate to the
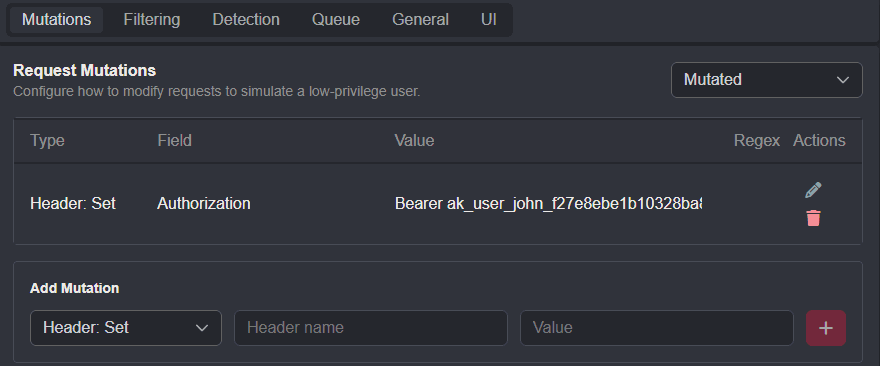
Configurationtab of the Autorize plugin interface, click on theMutationstab, and selectMutatedfrom the drop-down menu.Next, select the
Header: Setoption from theAdd Mutationdrop-down menu, type inAuthorizationin theHeader nameinput field, paste the token value into theValueinput field, and click on the+button to update and save the configuration.
Context-Menu Shortcut
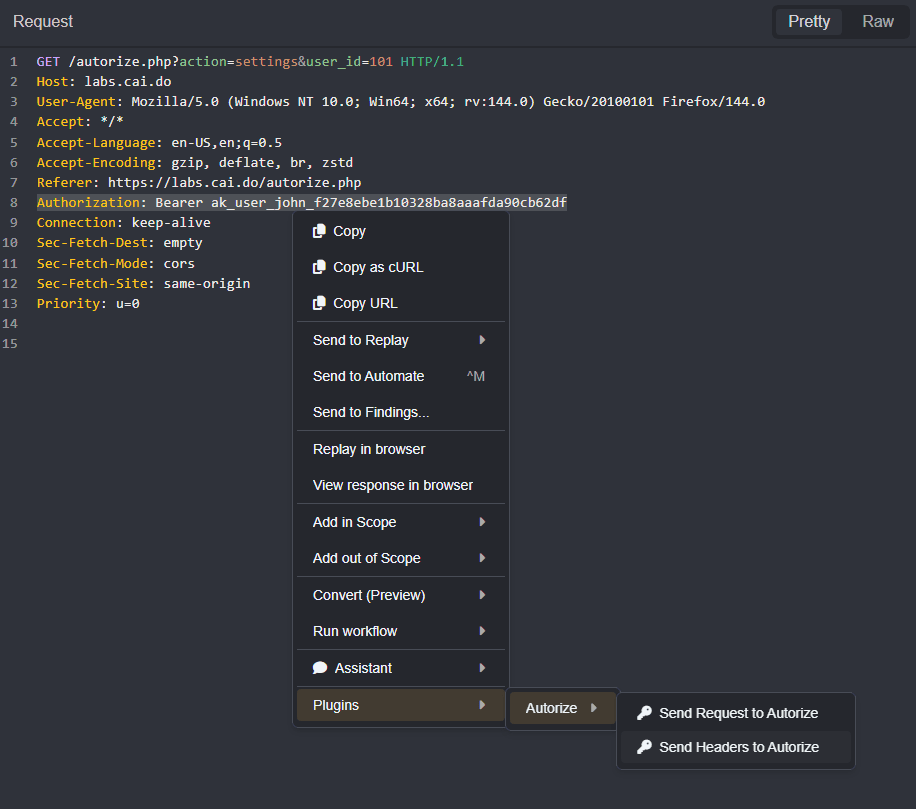
To quickly add a Header: Set mutation to the Mutated profile:
- Click, hold, and drag over a header name and value within a low-privilege user request pane.
- Then, right-click on the highlighted selection to open the context menu, hover your mouse cursor over
PluginsandAutorize, and selectSend Headers to Autorize.
INFO
By default, Autorize automatically removes common authentication headers like Authorization and Cookie from the No Auth profile. However, mutations can still be configured to account for application-specific implementations.
NOTE
Baseline mutations will apply to all three template requests.
Scanning
With the mutation set, testing can be conducted either passively against requests as they pass through Caido or actively against specific requests.
Passive Scanning
- To enable passive scanning click on the
Enable Passive Scanningradio button in the top-right corner of the plugin interface.

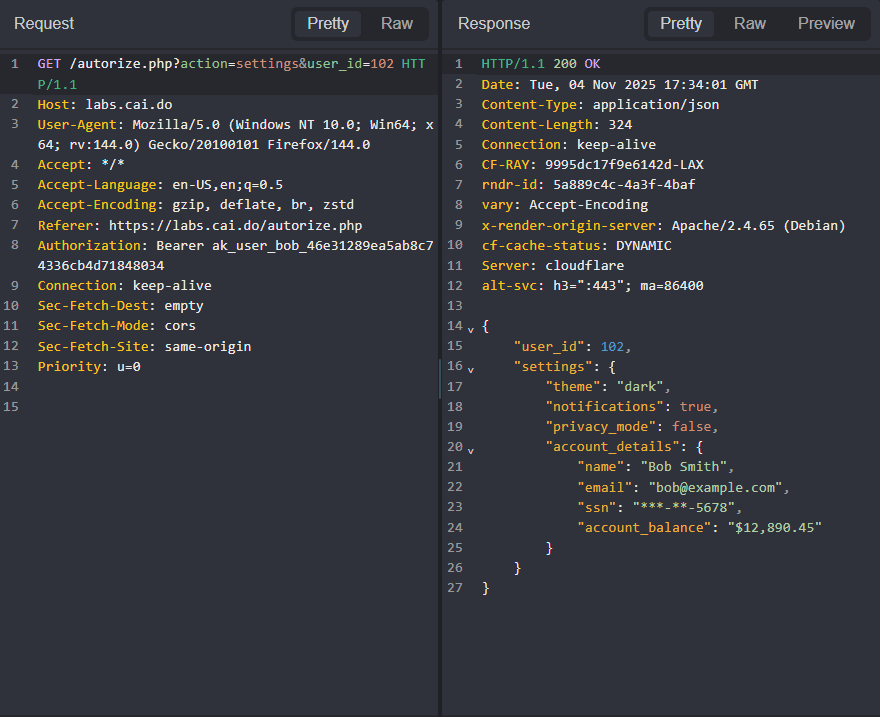
- Now, return to the lab interface and click on the
Get Bob's Tokenbutton to authenticate as Bob and make requests to the API endpoints that return sensitive data.
Active Scanning
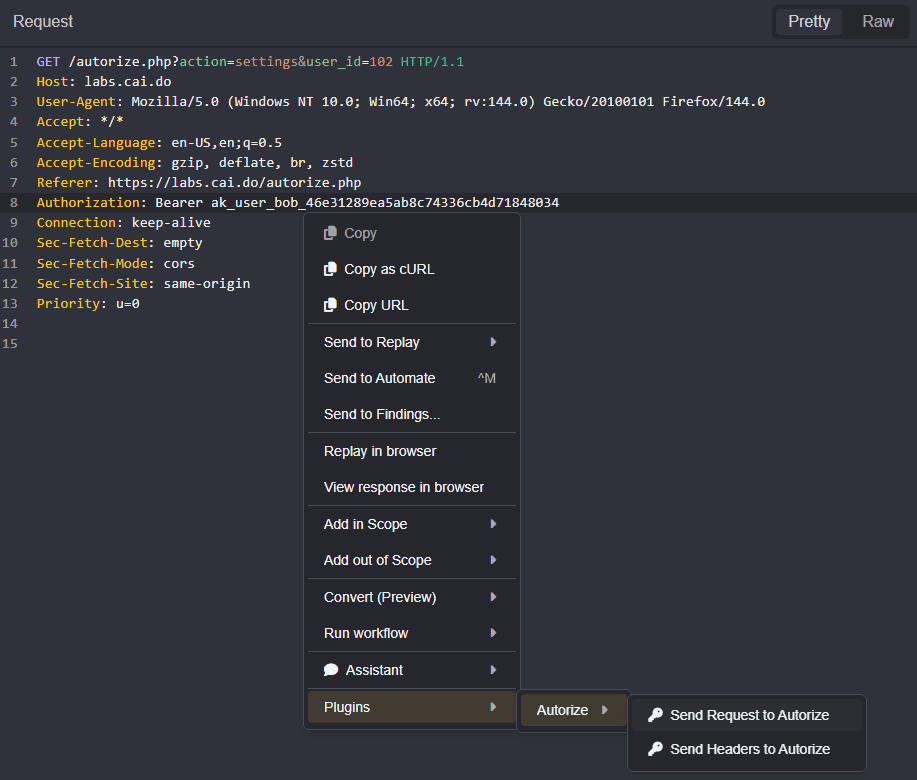
To execute a scan manually against a specific request right-click within a request pane or on a traffic table row, hover your mouse cursor over Plugins and Autorize, and select Send Request to Autorize.
Viewing Results
To view the results of template scans, click on the Dashboard tab of the Autorize plugin interface.

By default, the result of a template scan will be assigned one of three access states that will indicate whether the request succeeded or failed:
ALLOW: The server accepted the request and returned a successful response. This might indicate an authorization vulnerability if a low-privilege user was able to access protected resources.DENY: The server denied the request, usually with status codes like 401, 403, or 404. This means access controls are working as expected.UNCERTAIN: Autorize could not determine if the request was allowed or denied. This happens when the response is different from the baseline but does not show clear denial indicators. You should manually review these cases.
To switch between HTTP request and response data for each profile, click on their associated buttons.

The original requests made with Bob's session can be viewed by selecting baseline from the request pane.
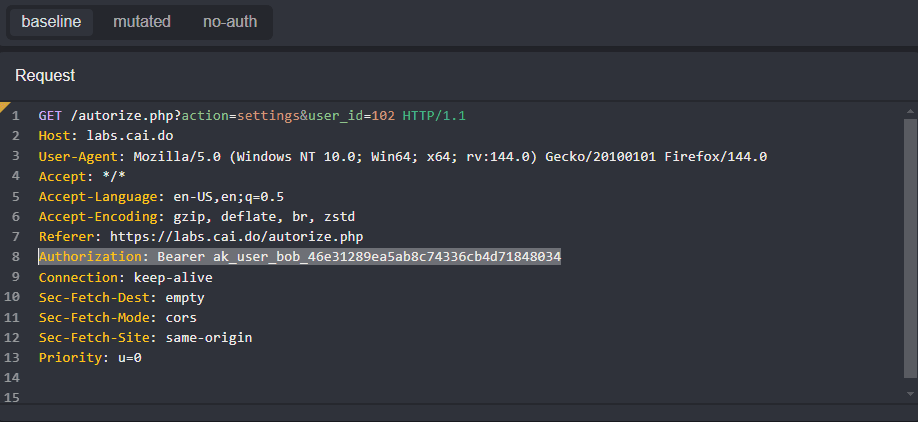
Select mutated to view the mutation that overwrote Bob's session token with John's.
Notice that John is able to access Bob's data in requests to the orders, messages, and settings endpoints.
Even unauthenticated users are able to access the sensitive information of other users in requests to the settings endpoint.
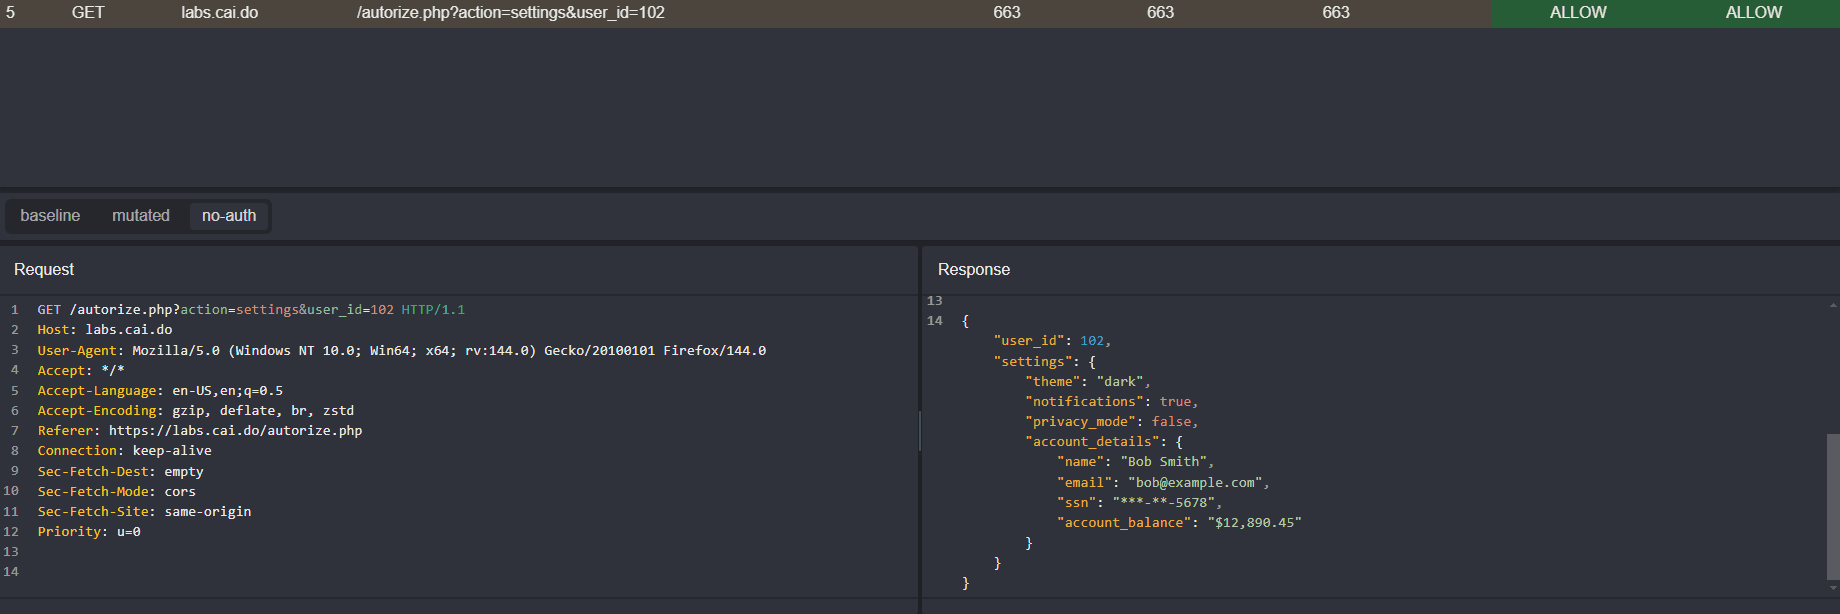
The only endpoint with proper access control to prevent unauthenticated or unauthorized users from viewing Bob's data is the profile endpoint.

Additional Configuration Options
Within the Configuration tab of the Autorize plugin interface, additional template settings are divided across several tabs.
Filtering
The Filtering tab options apply scope presets, filter presets, or HTTPQL query statements to passive scans.
INFO
By default, Autorize automatically excludes requests for common static files (images, CSS, JS) and analytic endpoints.
Detection
By default, Autorize uses smart logic to determine if a request was authorized or denied. However, for unique response patterns, custom HTTPQL query statements can be defined in the Authorized Response Detection and Unauthorized Response Detection input fields within the Detection tab.
NOTE
- If both queries match, the unauthorized query takes precedence.
- If neither query matches, the default detection logic will be used.
- This is optional. If not configured, the default detection logic will be used.
Queue
The Queue tab provides options to specify concurrency, rate limit, and timeout settings for the request templates generated by the plugin.
General
The General tab provides the option to include/exclude the No Auth request from template tests and an option to enable/disable detailed logging.
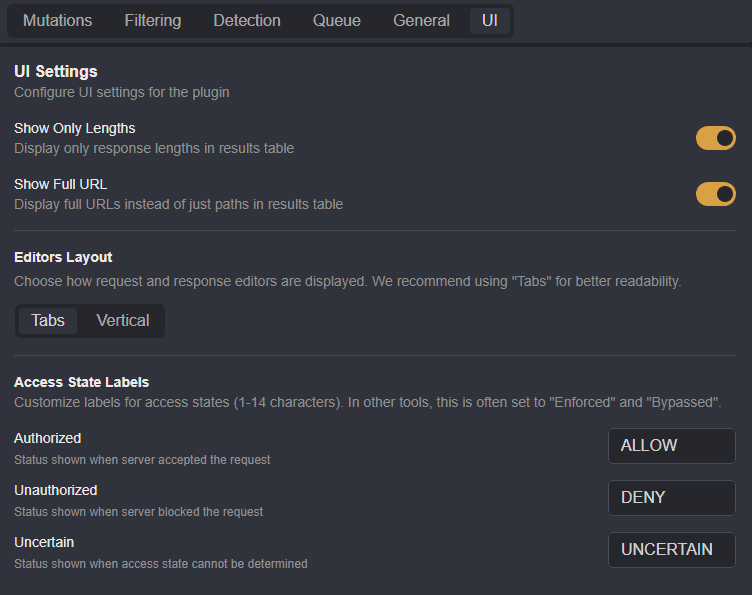
UI
The UI tab provides options to customize the results table within the Dashboard tab.