Android Setup and Configuration
In this tutorial, we will cover how to setup and configure an Android device in order to proxy HTTP/HTTPS traffic generated by Android applications.
WARNING
Caido is not liable for any malfunctions, failures, damages, loss/theft of data, or other technical issues that may occur with your device as a result of following this tutorial. Proceed at your own risk.
INFO
- Be aware that the exact names and locations of setting options may vary between devices.
- Ensure to pay attention to any prompts on the device itself while proceeding through these steps.
- For convenience, add all installed tools to your system's
PATHenvrionment variable to make them globally accessible. Ensure to restart your terminal afterwards so the changes take effect. - For physical devices, make sure the device is connected to the computer running Caido via USB and that both the device and the computer are on the same Wi-Fi network.
Android SDK Platform-Tools: adb
To interface with the Android device using your computer's terminal, you will need the Android Debug Bridge (adb) which is included in the Platform-Tools package of the Android SDK.
Download the Platform-Tools for your operating system. Once downloaded, unzip the folder.
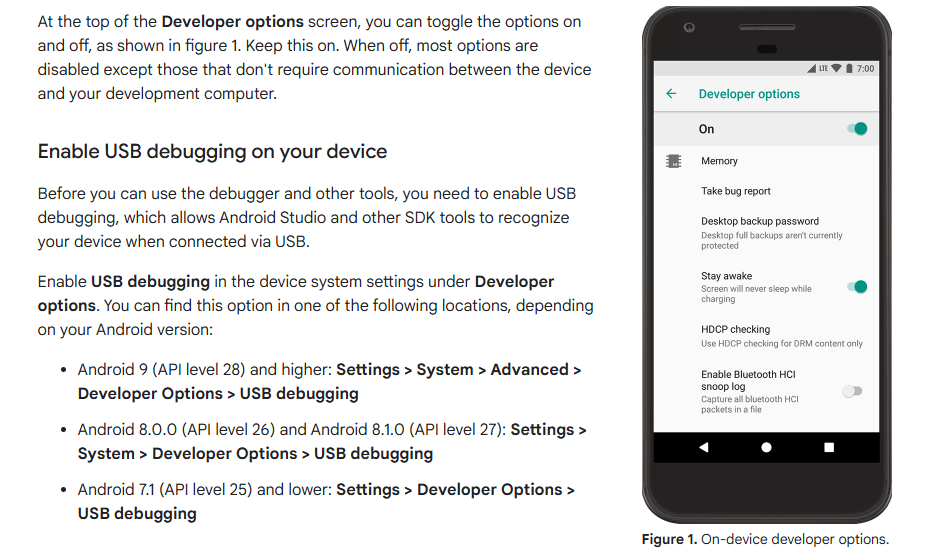
Developer Options
To use abd with a physical Android device, navigate to the device's settings and enable the Developer options. Then enable USB debugging.
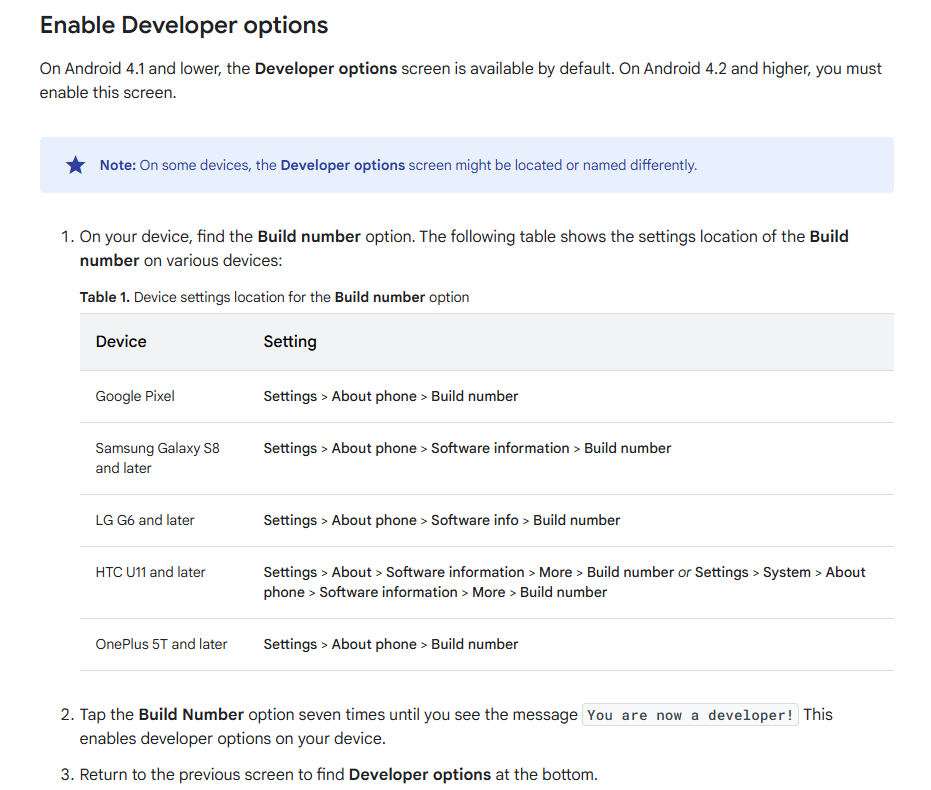
If the device is connected, it will be listed in the output of the adb devices command.


Configuring the Proxy Settings
For both physical and virtual devices:
- Navigate to the device Wi-Fi settings and select your network SSID.
- Access the
Advancedsettings of the network and select theManualoption from theProxydrop-down menu: - Set the proxy address to:
127.0.0.1:8080
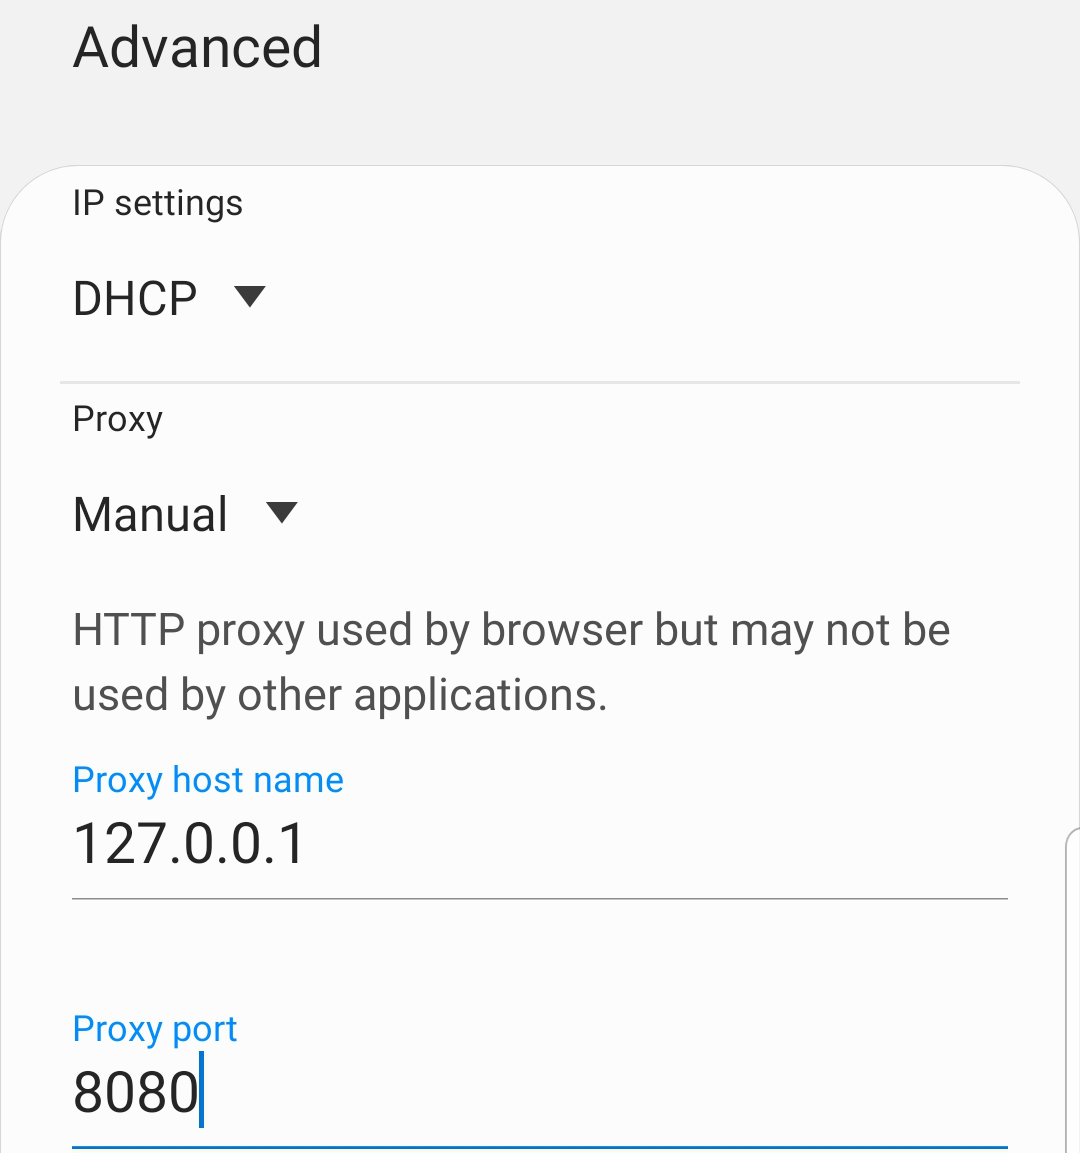
- Click
Saveto set the proxy configurations.
Port Forwarding
Since Caido is running on your computer, not your phone - run the following command to forward traffic from localhost:8080 on your device to port 8080 on your computer through the USB connection:
adb reverse tcp:8080 tcp:8080Certificate Stores
Clients maintain two certificate stores:
- System-store certificates: Pre-installed trusted Root and Intermediary CA certificates.
- User-store certificates: Added by the end user.
Adding a User Certificate
To proxy the HTTPS traffic that the device's mobile browser generates:
- With Caido running, navigate to http://127.0.0.1:8080/ca.crt in your device's browser to download Caido's CA certificate.
- In the device's settings, search for and select
Install a certificate, selectCA certificate, clickINSTALL ANYWAYon the warning screen to continue, and then select Caido's certificate.
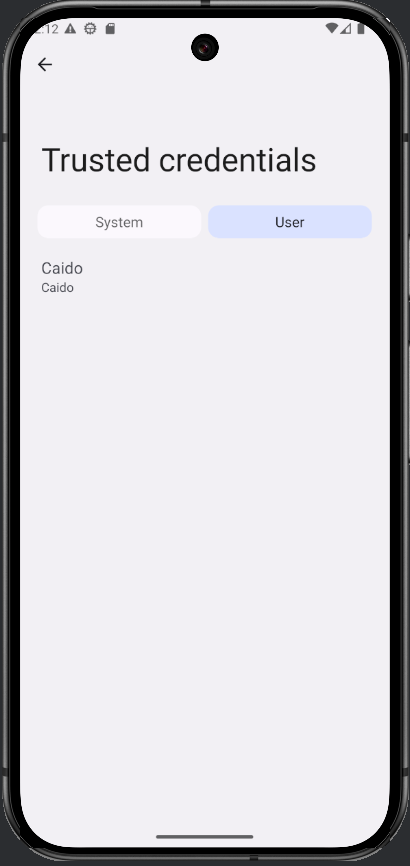
You can also view the certificate addition in the device's interface. Navigate to your device's settings and search for and select Trusted credentials. In the USER tab, it will be included in the list.
TIP
To test if the certificate was successfully installed for Wi-Fi, launch the device's browser and navigate to a website. You should see the traffic in Caido's HTTP History table.
What's next?
Applications may have security measures that will prevent them from working properly and allowing Caido to proxy the HTTPS traffic they generate. In some applications, only system certificates are trusted. For others, a security technique known as certificate pinning is used, which configures an application to only trust explicitly defined CA certificates.
To learn how to bypass these security mechanisms, continue with the tutorials below: