Workflows
Incorporating Workflows into your methodology greatly extends the functionality of Caido. The level of customization offered by Caido Workflows allows you to repeatedly apply certain actions/conversions that are commonly used in your testing process. Anything from encoding data to complex sequences of modifications based on certain conditions by utilizing flow paths are possible with Workflows.
Multi-step processes that, before, needed to be performed manually can be saved within a Workflow for immediate, discretionary and repeated use - ensuring your testing is as time-efficient as possible.
Workflows Layout

- Select the
Workflowstab from the left-hand menu within the Caido window. - The three types of Workflows (
Passive/Active/Convert) are listed horizontally here as tabs. Click to toggle between them. - Click on the red
+ New Workflowbutton paired with the desired type tab selected to create a new Workflow of that type. - Toggling the
Enabledcheckbox from filled to empty will dictate the inclusion/exclusion of the associated Workflow in the user interface respectively.
INFO
By default, Workflows are present globally (meaning they will span across all your Projects).
- To render a Workflow specific to a project - click the
Switch to project-specifictext within the parenthesis. - Clicking the
Editbutton will present the Workflow editor and theDuplicatebutton will create a copy of the Workflow. - Clicking on
Community Workflowswill open a browser window to Caido's Workflow Github Repository. Here you can download Workflows created by other Caido users or submit your own!
INFO
Workflow files are JSON based.
- Click
Downloadto locally download the selected Workflow. To delete the selected Workflow - clickDelete. Importallows you to select downloaded Workflows to use in your Caido instance.
The Workflow Editor
INFO
This interface will be displayed after clicking either the + New Workflow button or the Edit button on an existing Workflow.
You will first be presented with a pane that includes fields to name your new Workflow as well as provide an optional description. Click Save to apply these properties.
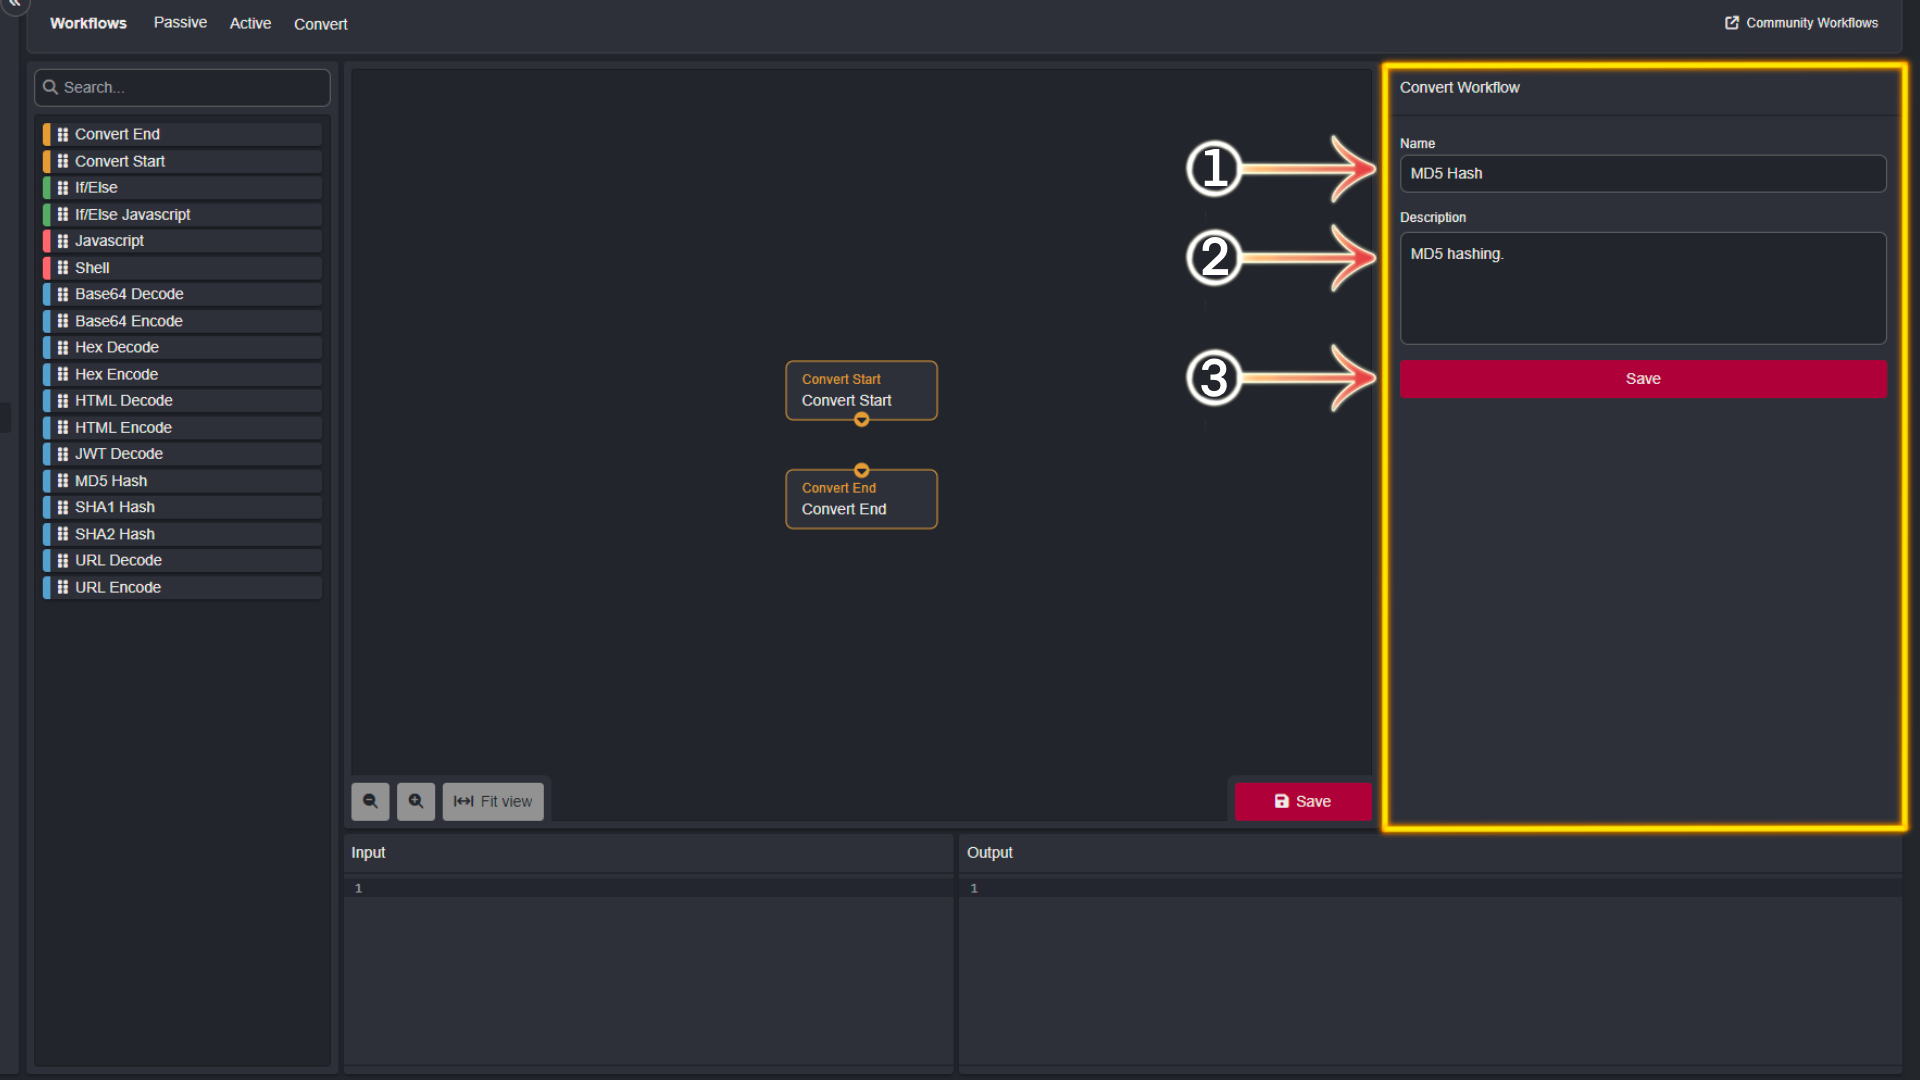
The name and description pane will switch to a pane that displays a Node's properties when one is selected.
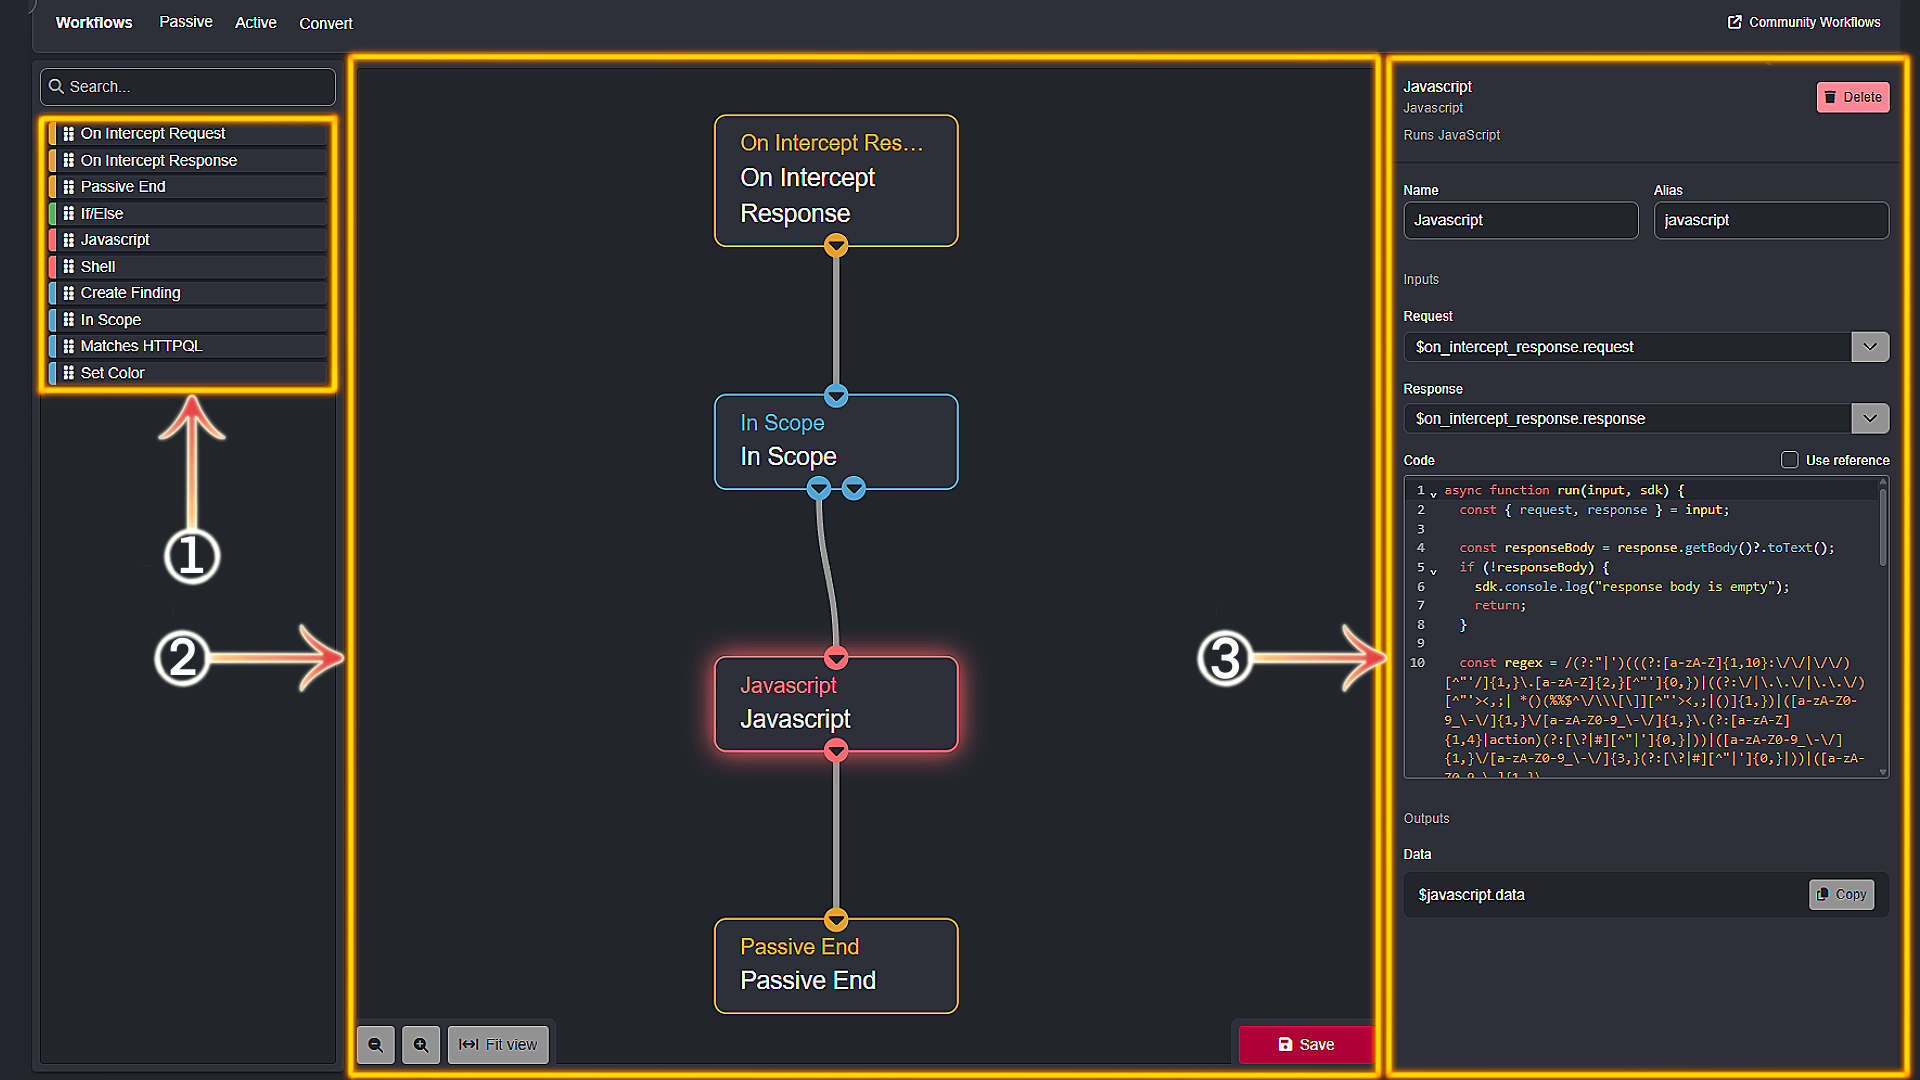
- The available Nodes based on the selected Workflow type are displayed in this pane. They are represented as draggable blocks. To use a Node, simply click, hold and drag one into the pane directly right.
- This pane is where your Workflow is created. Here, Connections between Nodes are made. Clicking a Node will select it (observe the highlighted border). The ability to save the Workflow as well as view options are included within this pane as well.
- After selecting a Node, the Node's properties are displayed here. The ability to delete the currently selected Node is included in this pane as well.