Automate
The Automate interface allows you to send requests in bulk. This feature provides a flexible way to initiate bruteforce/fuzzing campaigns to rapidly modify certain parameters of requests using wordlists.
Advanced setting options ensure your campaign can account for events such as failed requests or rate-limiting. You can transfer requests to the Automate interface from many other Caido interfaces.
You can create a request from scratch from a blank template, or start from any existing request inside the application.
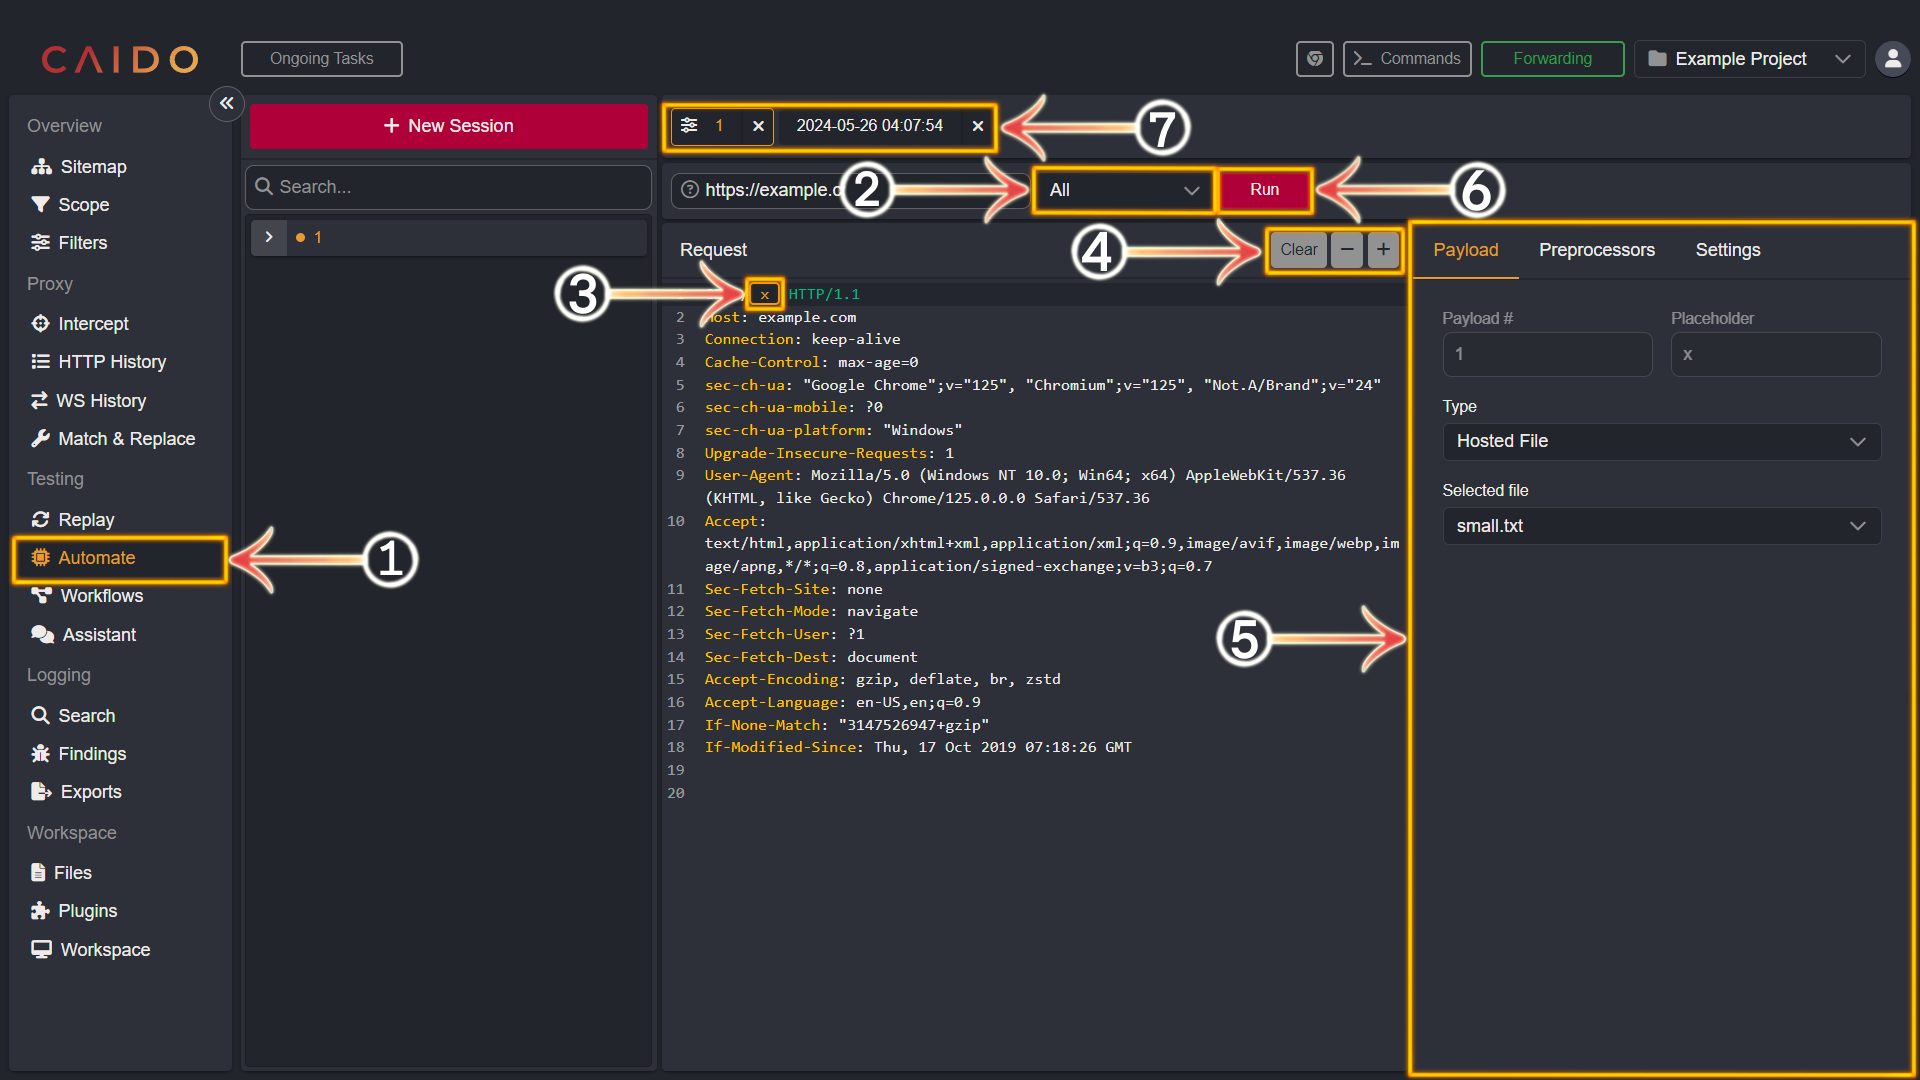
- Select the
Automatetab from the left-hand menu within the Caido window. - Select the Attack Strategy.
- Highlight the element(s) you wish to brute-force/fuzz.
- Once the element is highlighted - click
+to convert it to a placeholder. You can remove a placeholder/placeholders by selecting them and then clicking-or you can clear all placeholders by clickingClear. - Select a Payload Type, apply Preprocessors and set additional Settings within this pane.
- Click
Runwhen your automation campaign is configured to begin brute-forcing/fuzzing. - The configuration tab as well as the associated results tab will be paired next to each other here.
Automate Results
To inspect the results of your Automate campaign - proceed with the following steps:
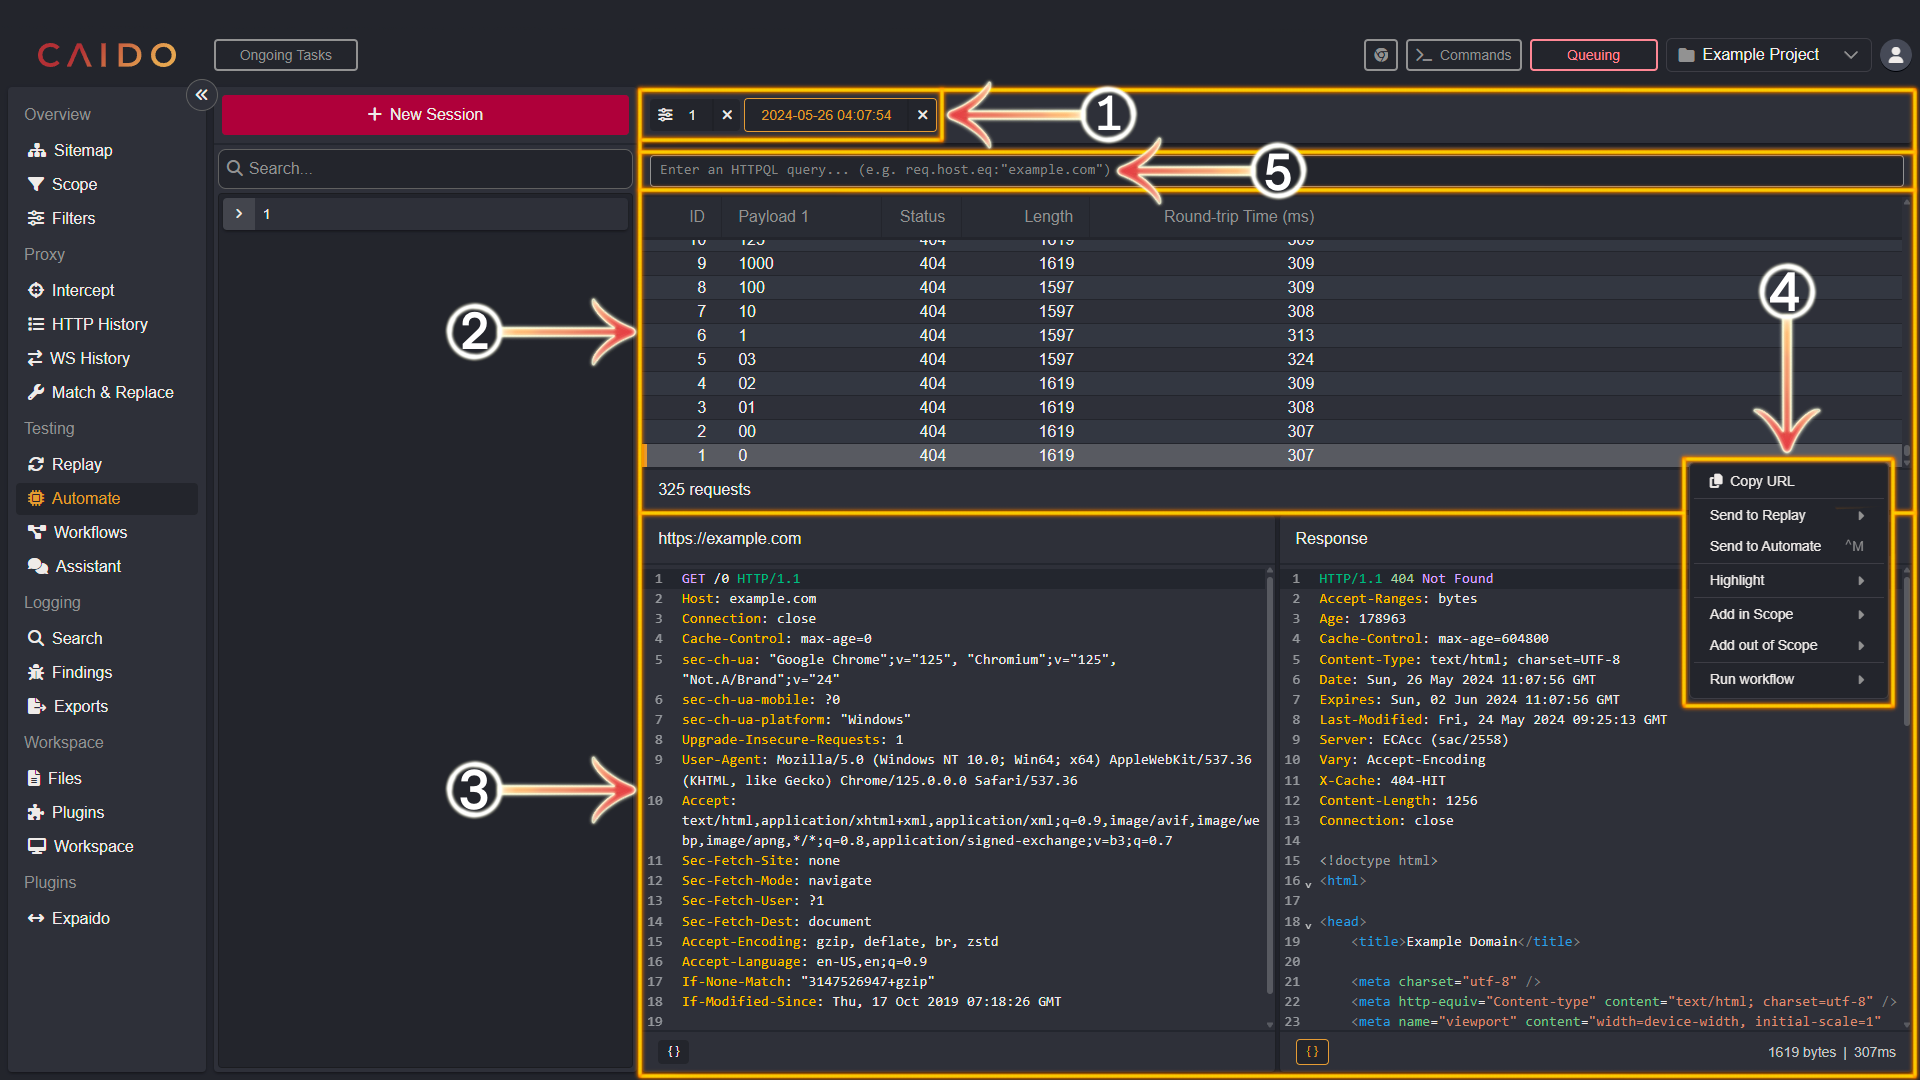
- Click the paired tab.
- Each request will be displayed in this pane.
- This pane will display the selected request and it's associated response.
- This is the resulting list of options presented after right-clicking within the request pane.
- The HTTPQL query input bar.
Attack Strategies
Caido currently provides the following attack Strategies:
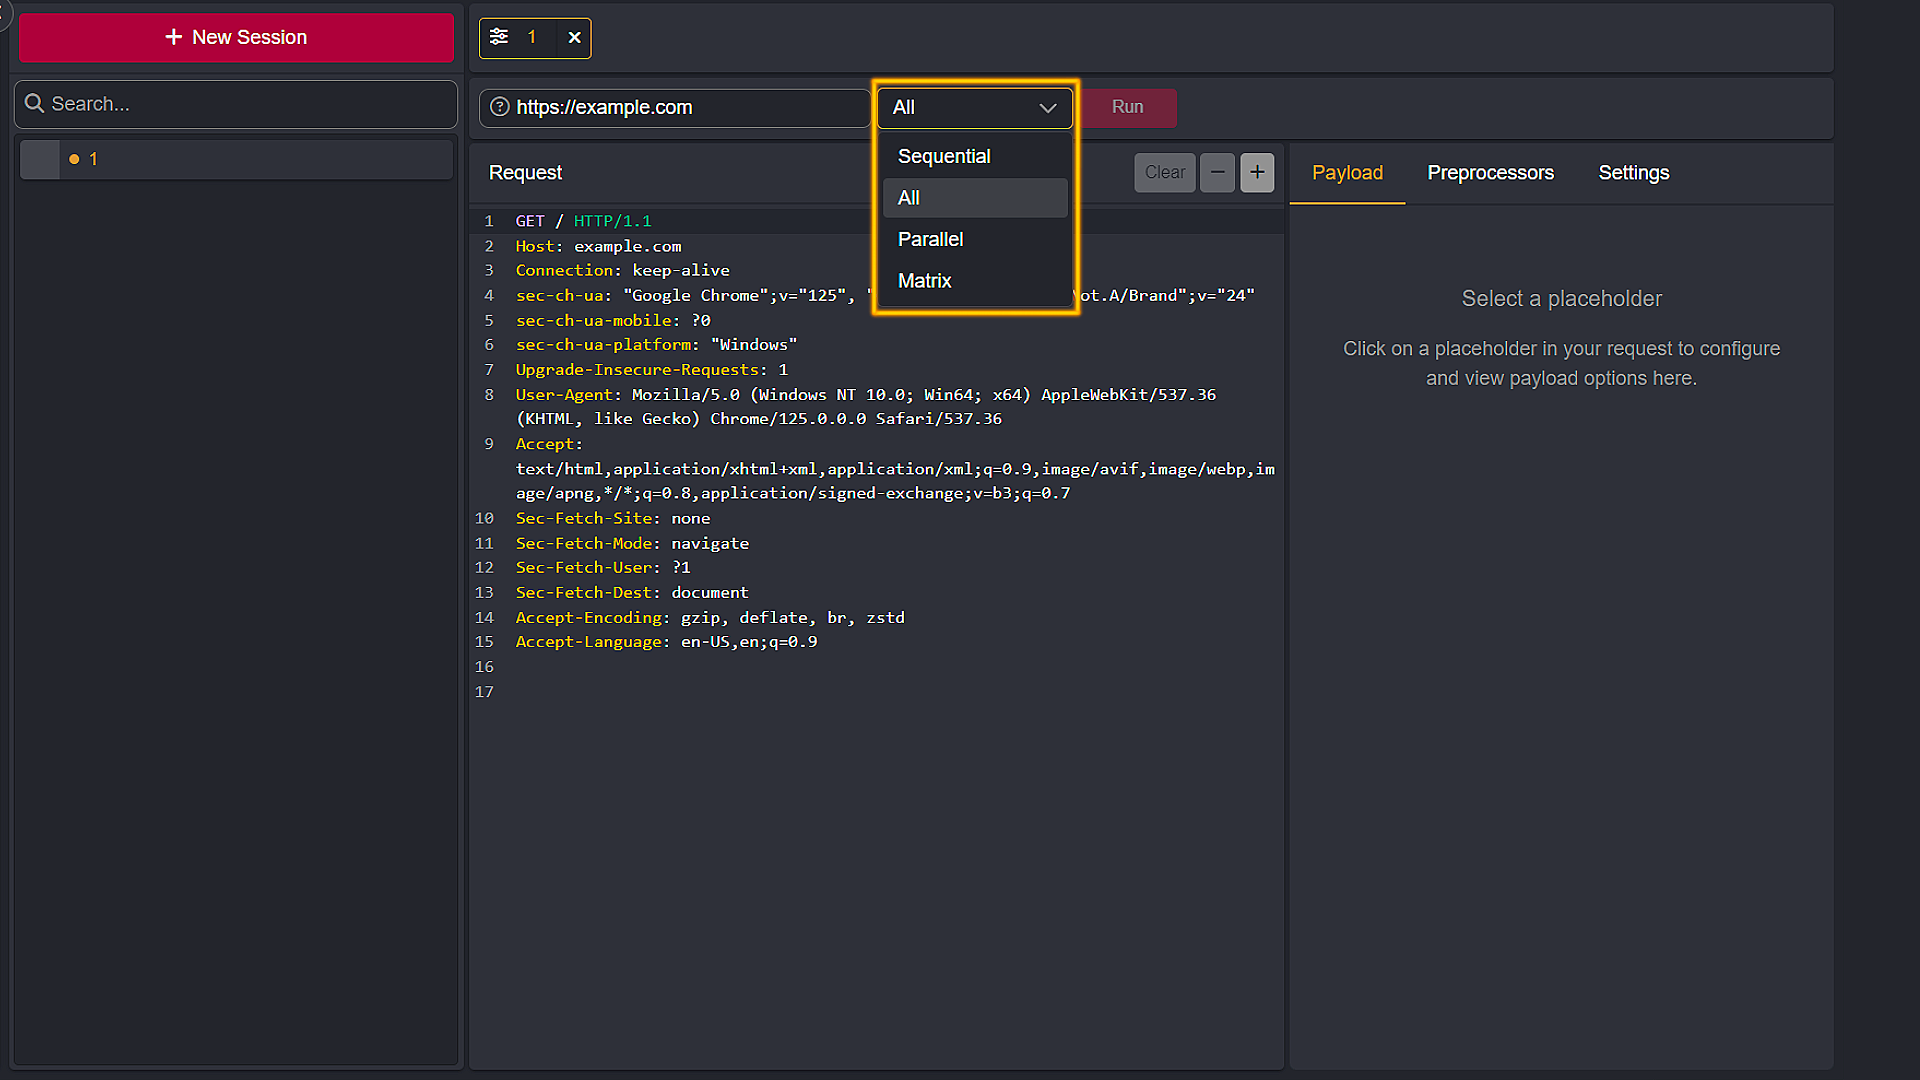
- Sequential (Sniper): This will replace markers one at a time. If you have multiple markers, only one will be replaced for any given request.
- All (Battering Ram): This will replace all the markers with the same value.
- Parallel (Pitchfork): This will replace all the markers with different values from the different payloads. This requires payloads that each have the same number of elements.
- Matrix (Cluster Bomb): This will replace all the markers with all the combinations of payloads. Payloads can have different number of elements, but beware that this can create a large number of requests.
Payload Types
For each payload, you can choose a Type from the list:
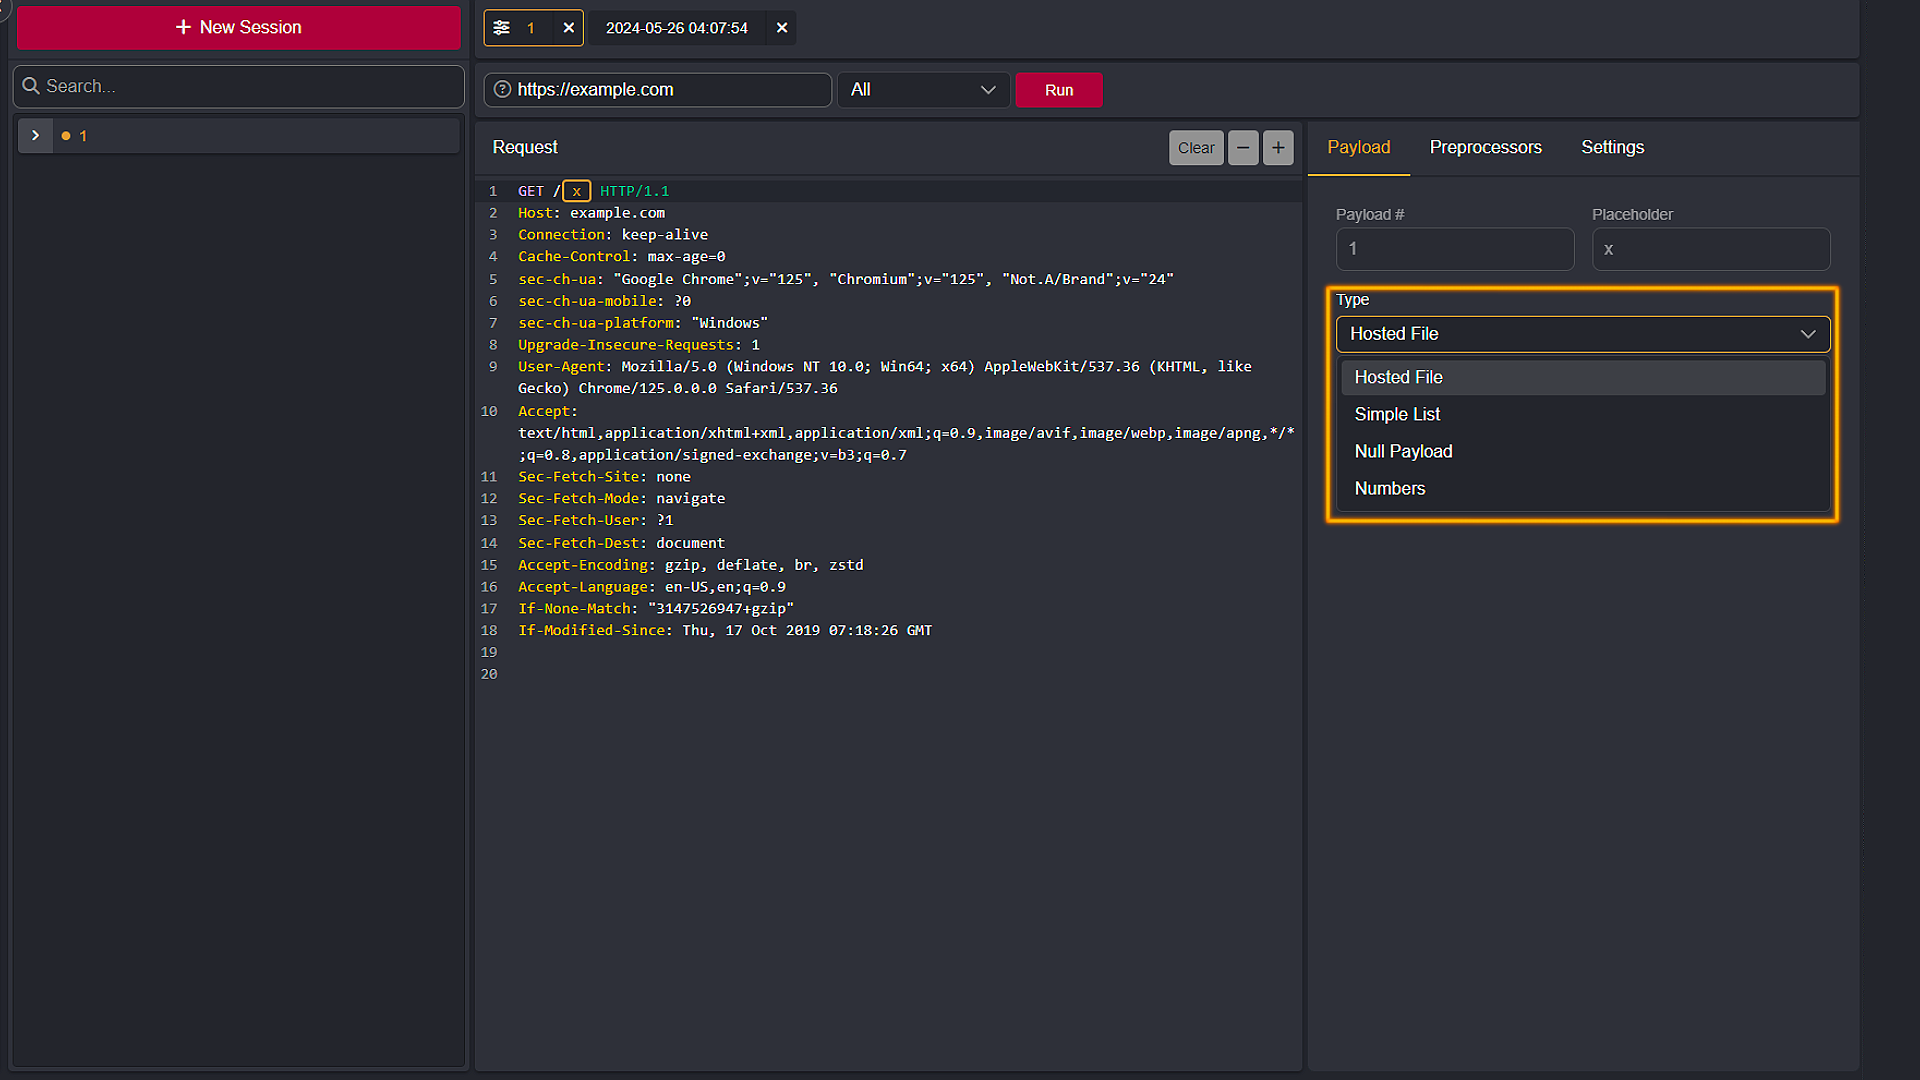
- Hosted File: Allows you to select one of the files you had previously uploaded to the Caido Instance. View the Files documentation for more information.
- Simple List: For cases where you want to test a short manually created list of elements.
- Null Payload: Generate requests without changing anything in it.
- Numbers: Generates a range of specified integers to use as a payload.
Preprocessors
Preprocessors enable you to apply additional modifications to the payloads.
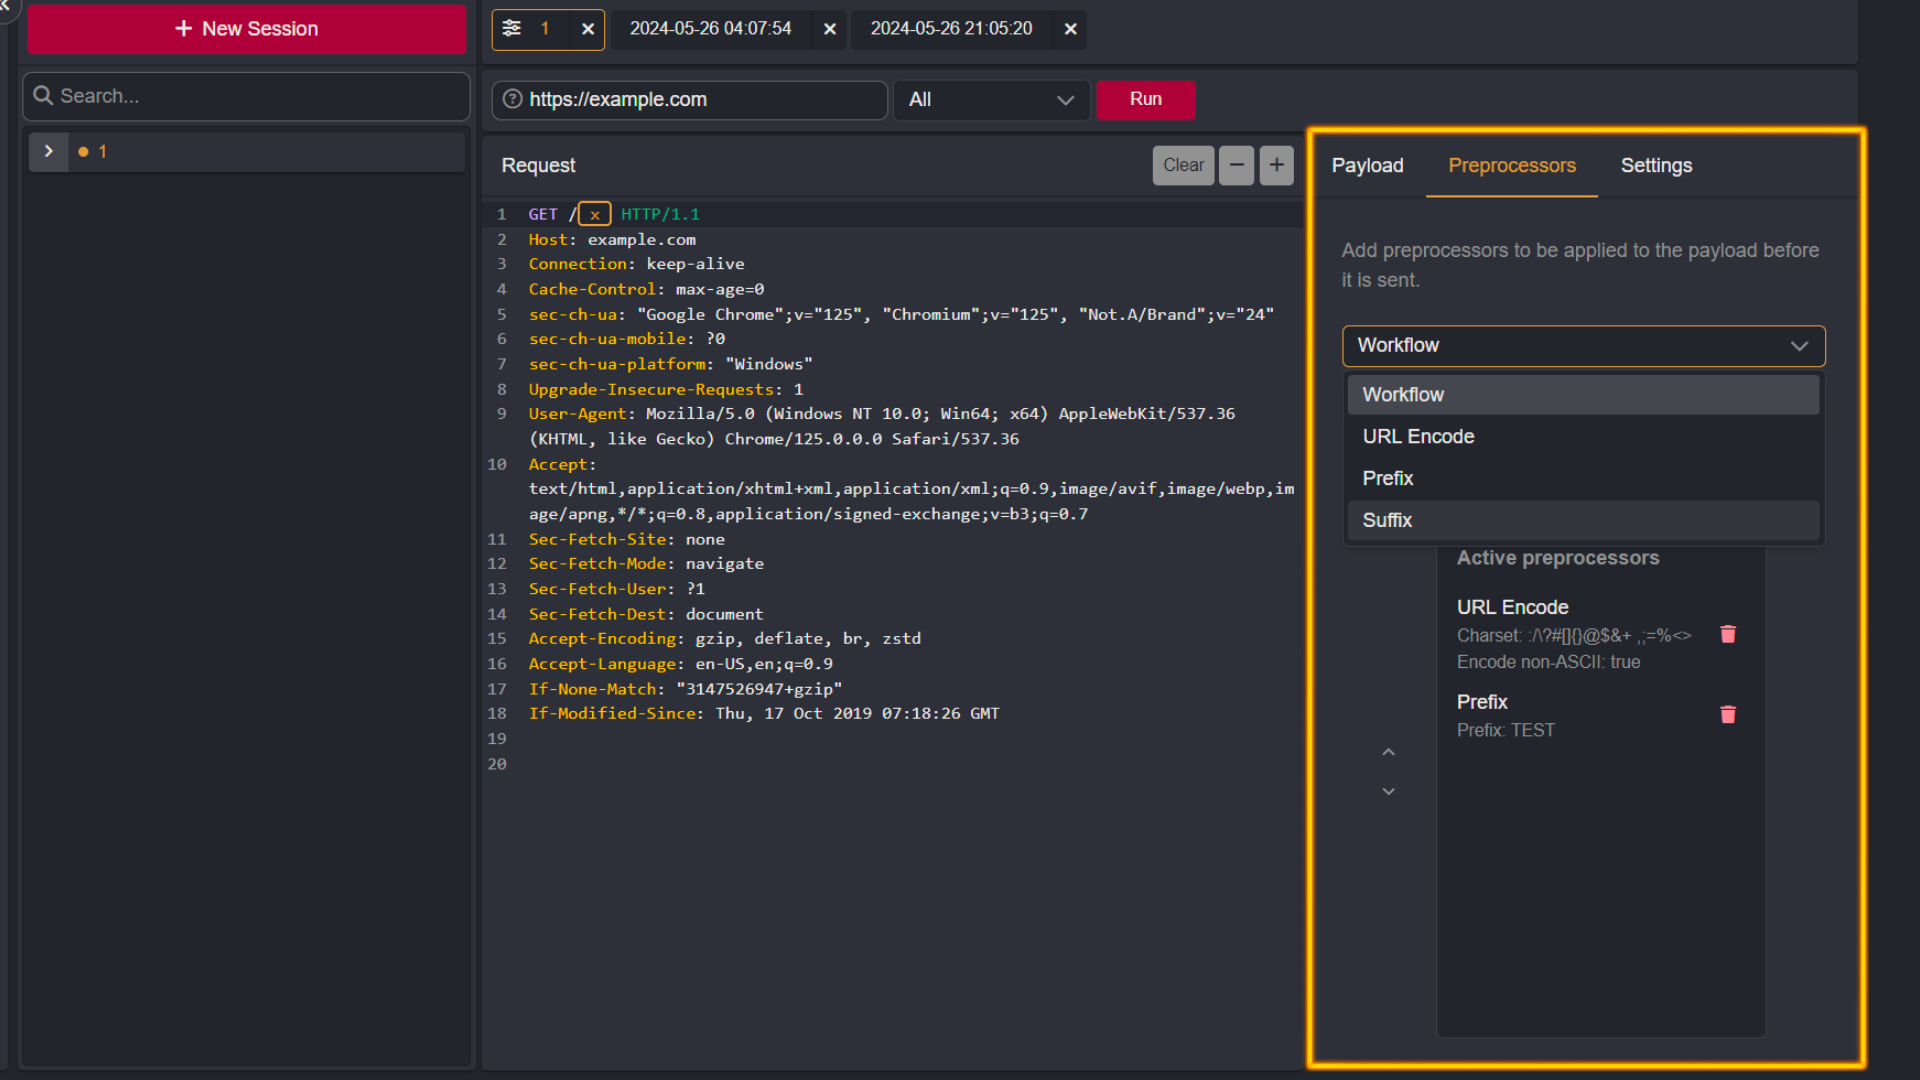
- Workflow: Select a default or custom made Workflow to apply to the requests that will be sent in your campaign. View the Workflow documentation for more information.
- URL Encode: This option includes an input bar in which you can supply characters to URL encode before the requests of your campaign are sent. There is also a checkbox to toggle between encoding/not encoding non-ASCII characters.
- Prefix: Allows you to prefix a payload value with a supplied value.
- Suffix: Allows you to append a supplied suffix value to a payload value.
⚡PRO FEATURE
Workflow Preprocessors are only available to Caido Pro users.
Settings
Additional setting options allow you to fine tune how the Automate session will run.
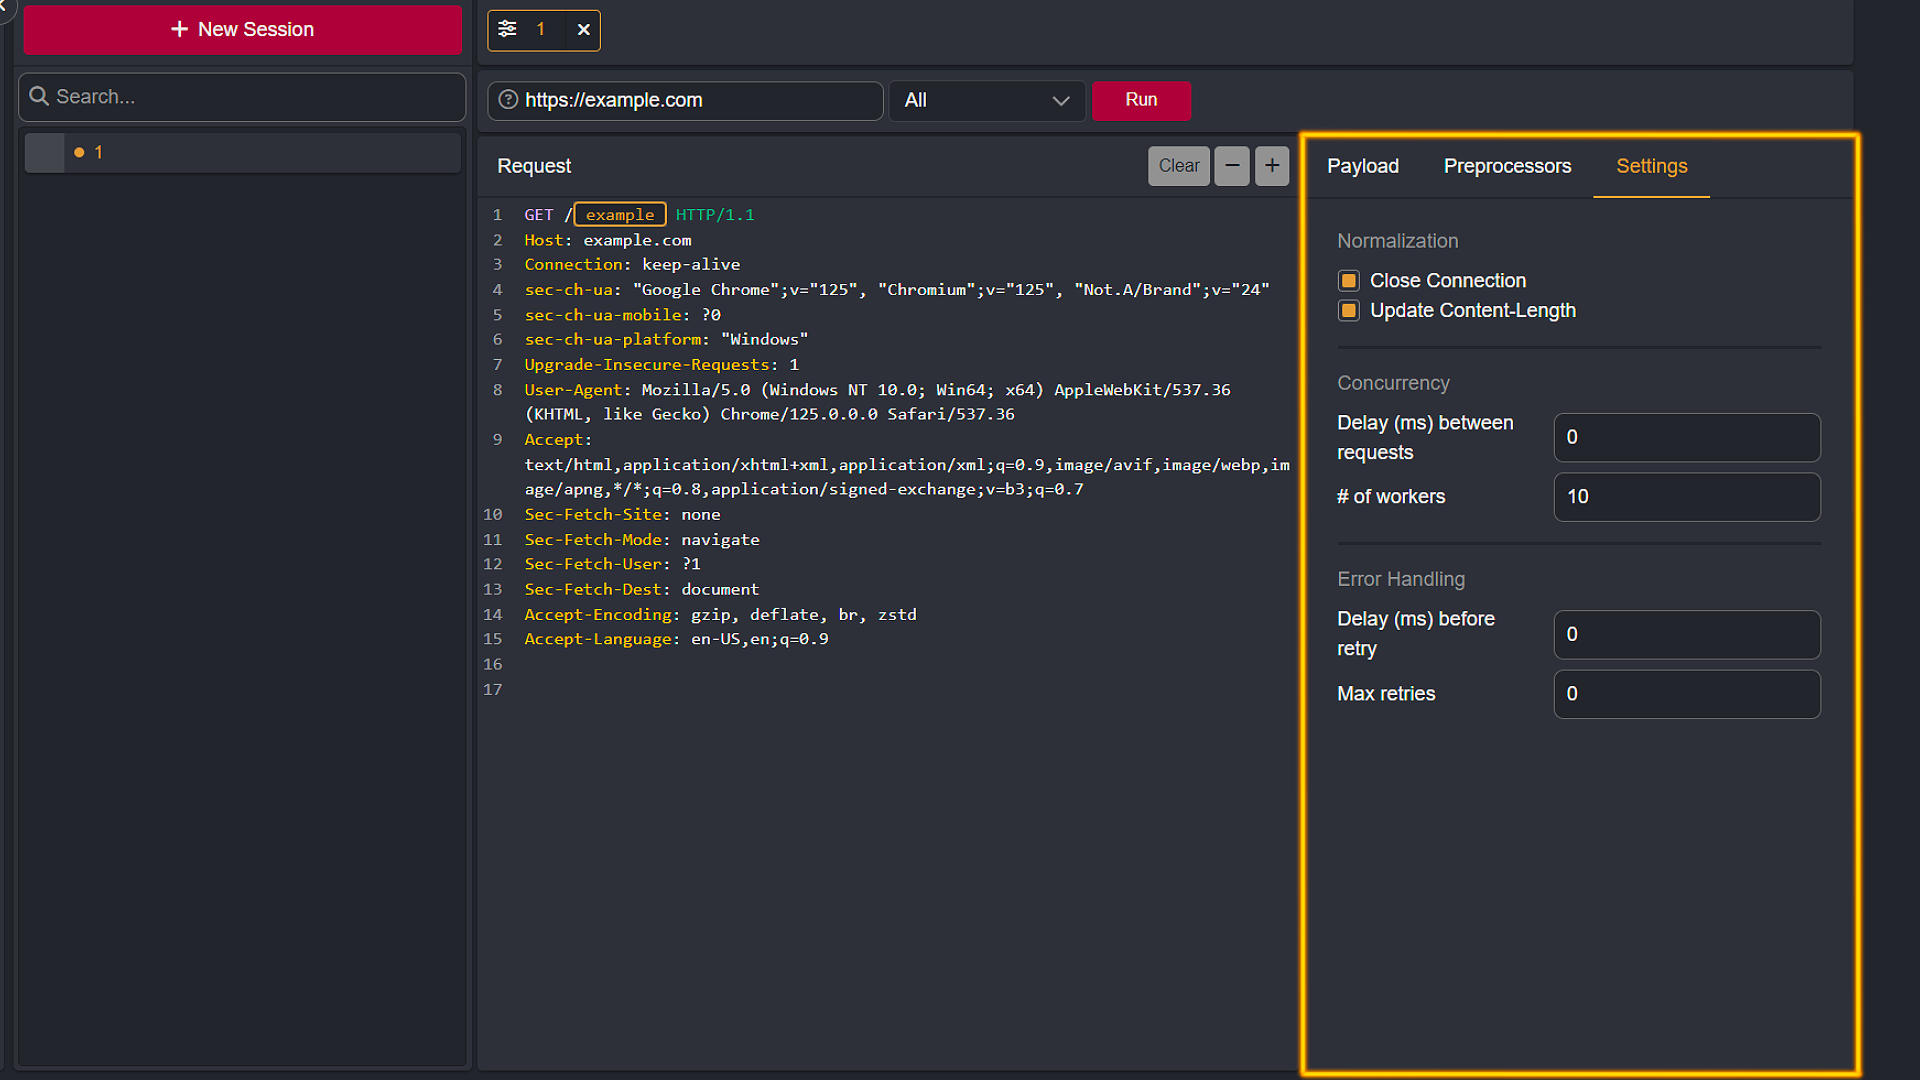
- Close Connection: Toggle between keeping the socket connection or closing the socket connection after the paired response to a request is received.
- Update Content-Length: Automatically update the value of the Content-Length header to account for the payload.
- Delay (ms) between requests: The time in milliseconds to sleep between forwarding requests.
- # of workers: The number of threads to run.
- Delay (ms) before retry: The time in milliseconds to sleep until retrying a failed request.
- Max retries: The number of reattempts to perform upon a failed request before moving on to the following requests.
Additional Information
TIPS
- Clicking the column names (located at the top and spanning horizontally) within the results payload list pane will sort the requests by the selected column category. View the Sorting by Properties documentation for more information.
- Clicking the
{}button will toggle the Pretty/Raw display option. - If you have installed the rendering engine - clicking the image icon located at the top-right corner of the response pane will present a visual representation of the response.