Automating Brute-Forcing/Fuzzing
Automate
TIP
To send a request to Automate, either right-click inside the request pane of Intercept or HTTP History or focus the request pane and use CTRL+M.
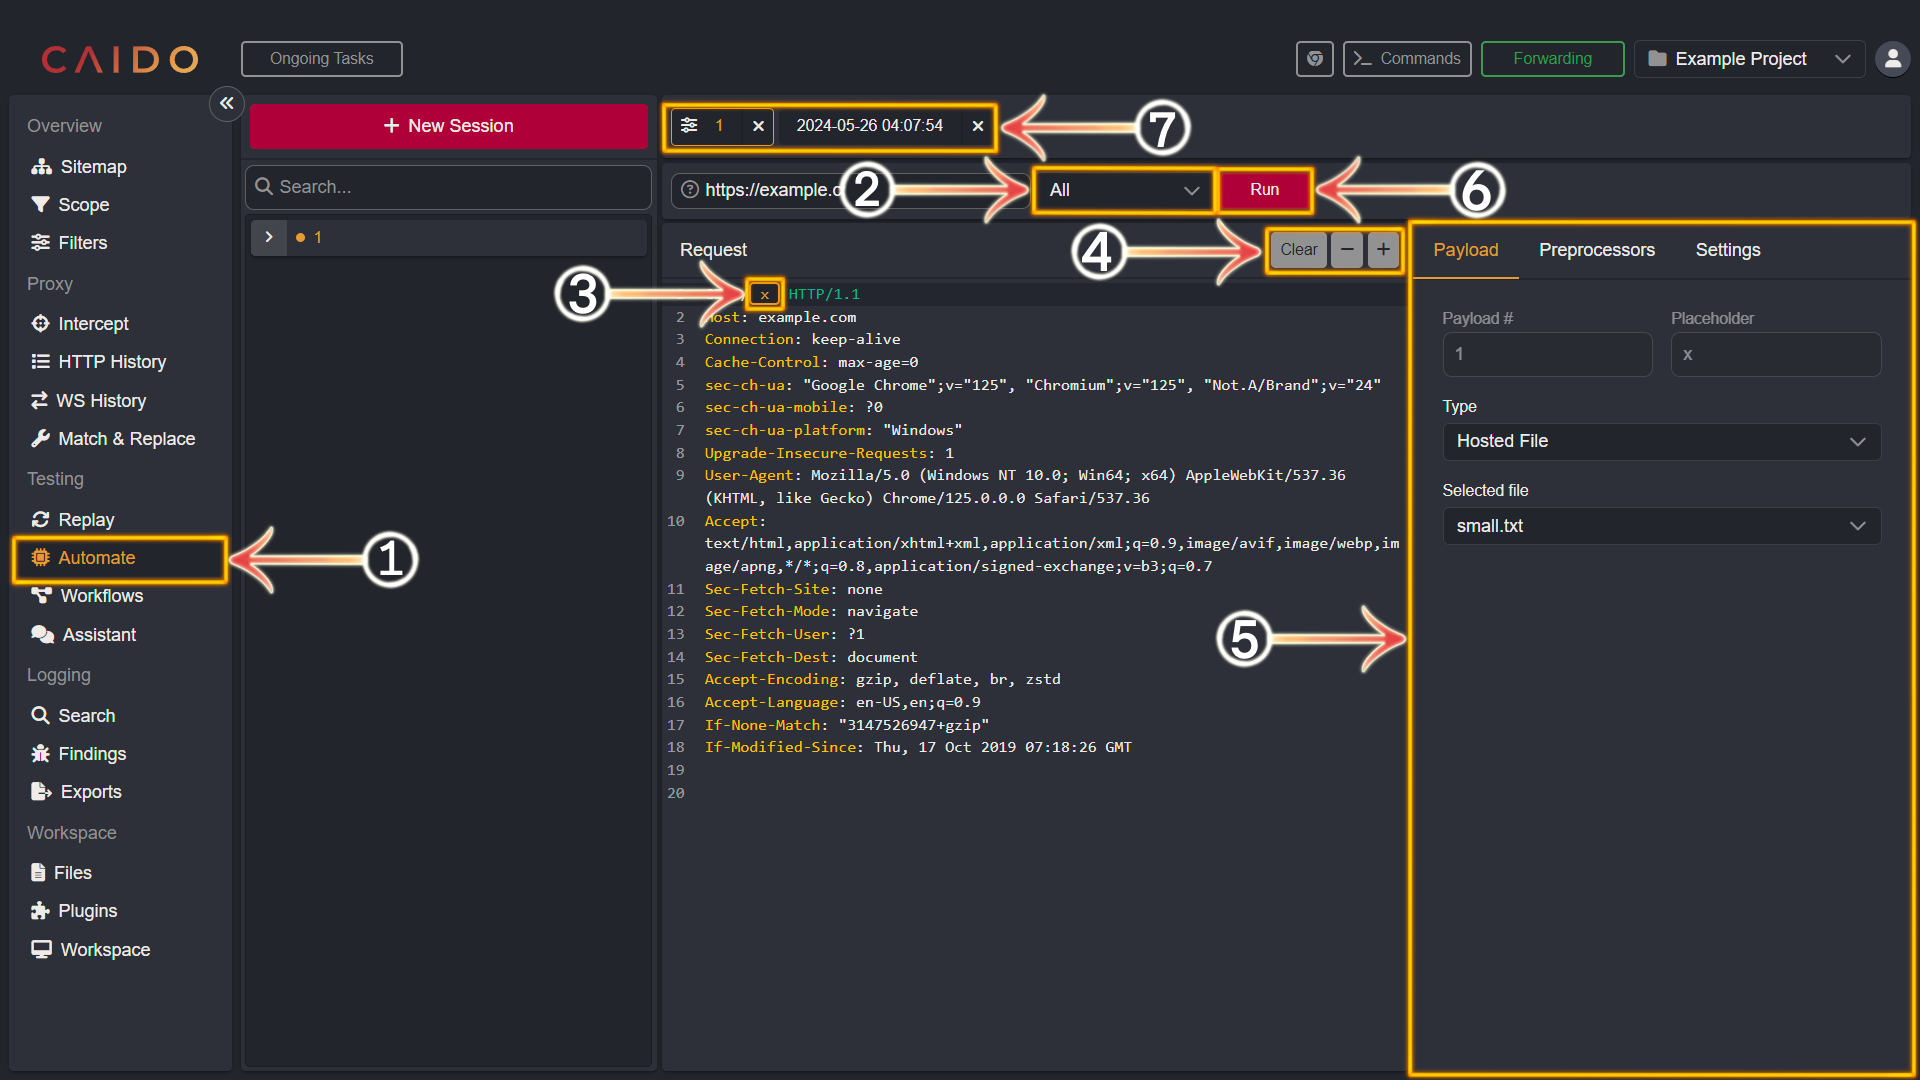
- Select the
Automatetab from the left-hand menu within the Caido window. - Select the Attack Strategy.
- Highlight the element(s) you wish to brute-force/fuzz.
- Once the element is highlighted - click
+to convert it to a placeholder. You can remove a placeholder/placeholders by selecting them and then clicking-or you can clear all placeholders by clickingClear. - Select a Payload Type, apply Preprocessors and set additional Settings within this pane.
- Click
Runwhen your automation campaign is configured to begin brute-forcing/fuzzing. - The configuration tab as well as the associated results tab will be paired next to each other here.
Automate Results
To inspect the results of your Automate campaign - proceed with the following steps:
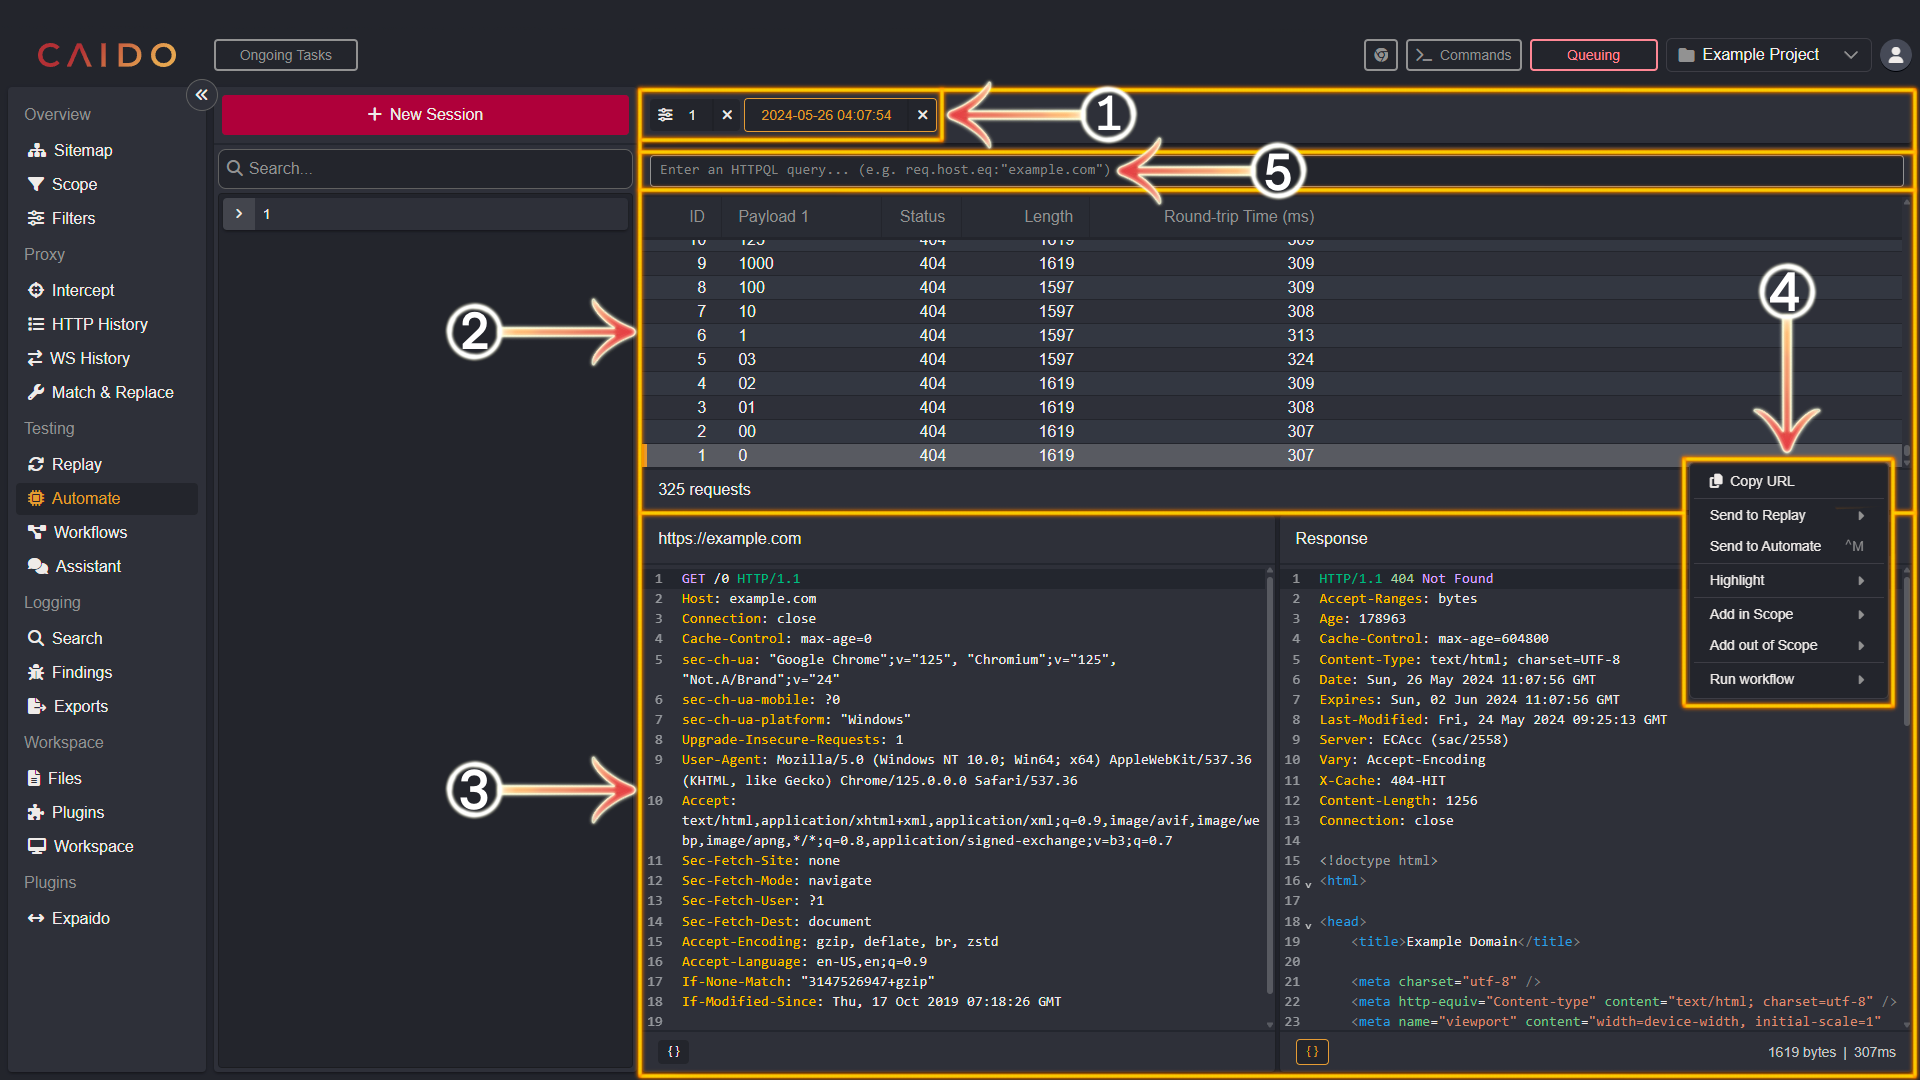
- Click the paired tab.
- Each request will be displayed in this pane.
- This pane will display the selected request and it's associated response.
- This is the resulting list of options presented after right-clicking within the request pane.
- The HTTPQL query input bar.
Attack Strategies
Caido currently provides the following attack Strategies:
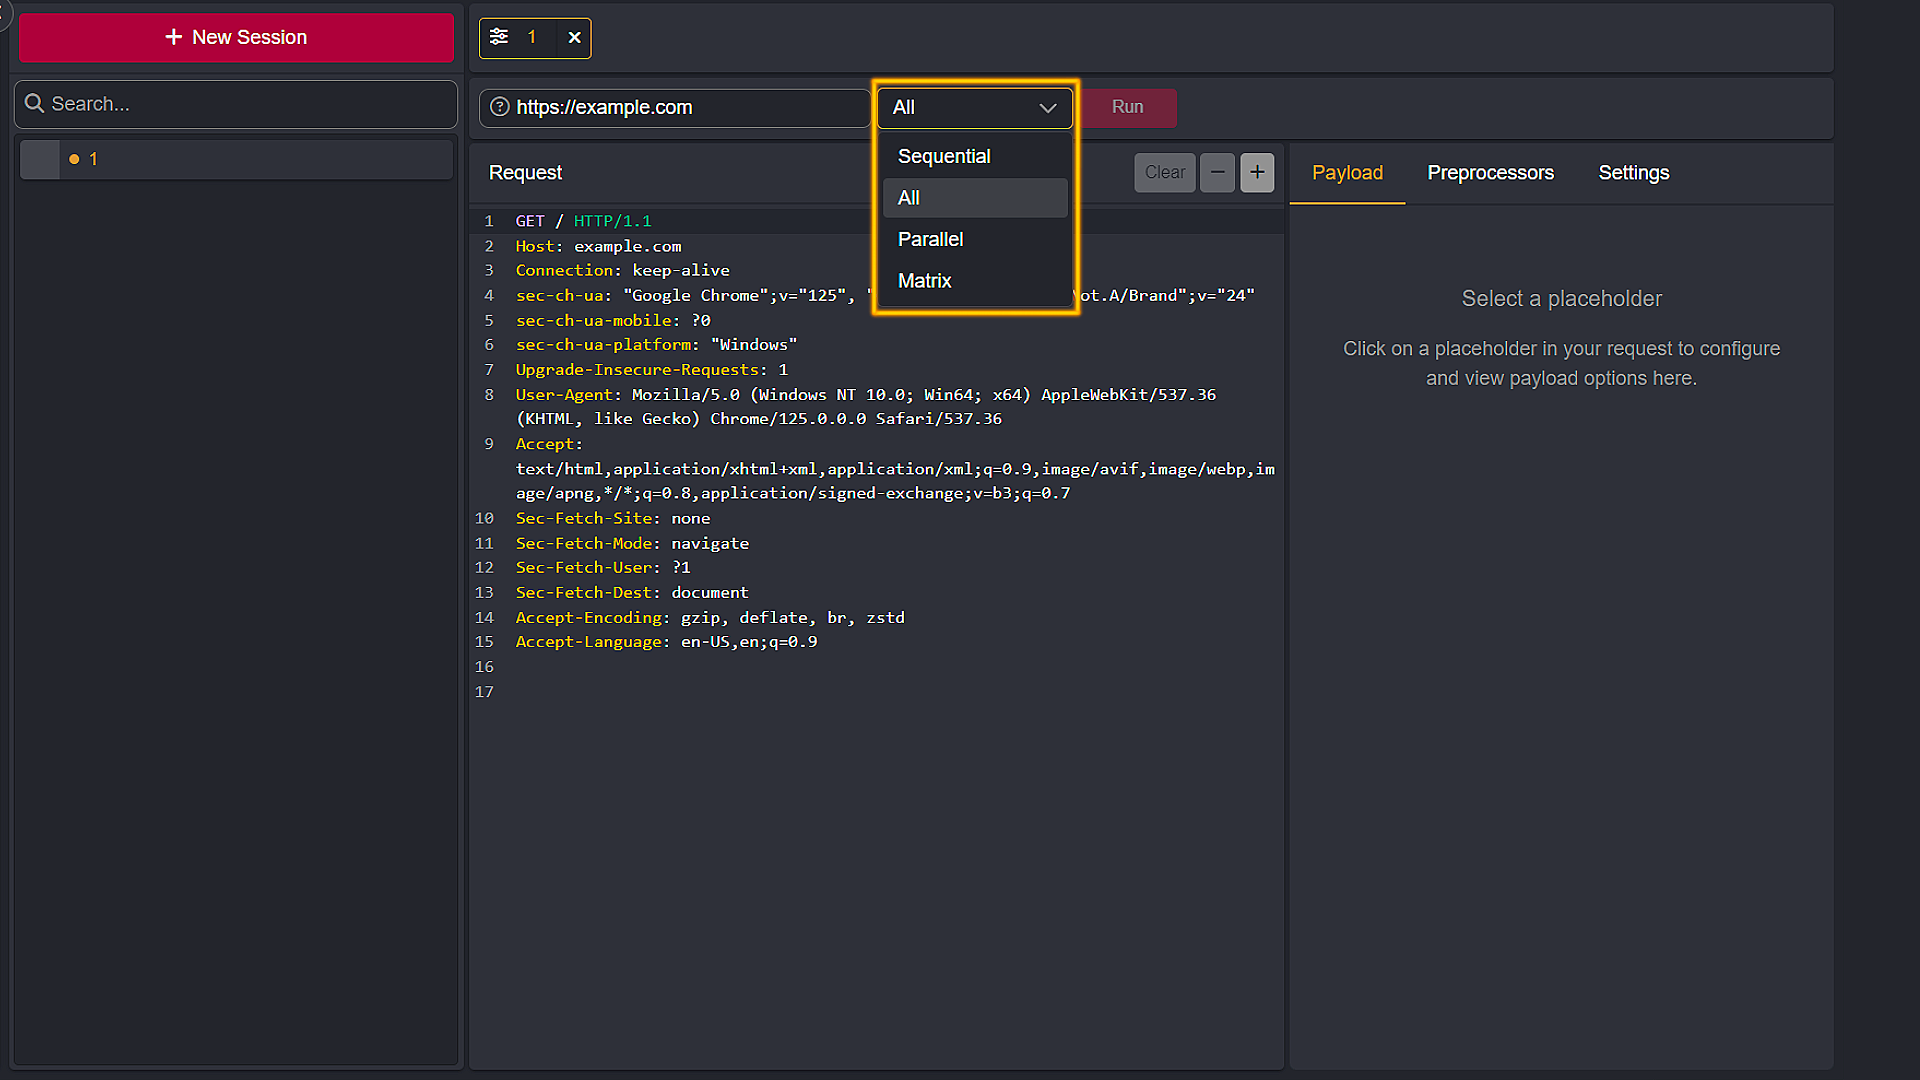
- Sequential (Sniper): This will replace markers one at a time. If you have multiple markers, only one will be replaced for any given request.
- All (Battering Ram): This will replace all the markers with the same value.
- Parallel (Pitchfork): This will replace all the markers with different values from the different payloads. This requires payloads that each have the same number of elements.
- Matrix (Cluster Bomb): This will replace all the markers with all the combinations of payloads. Payloads can have different number of elements, but beware that this can create a large number of requests.
Payload Types
For each payload, you can choose a Type from the list:
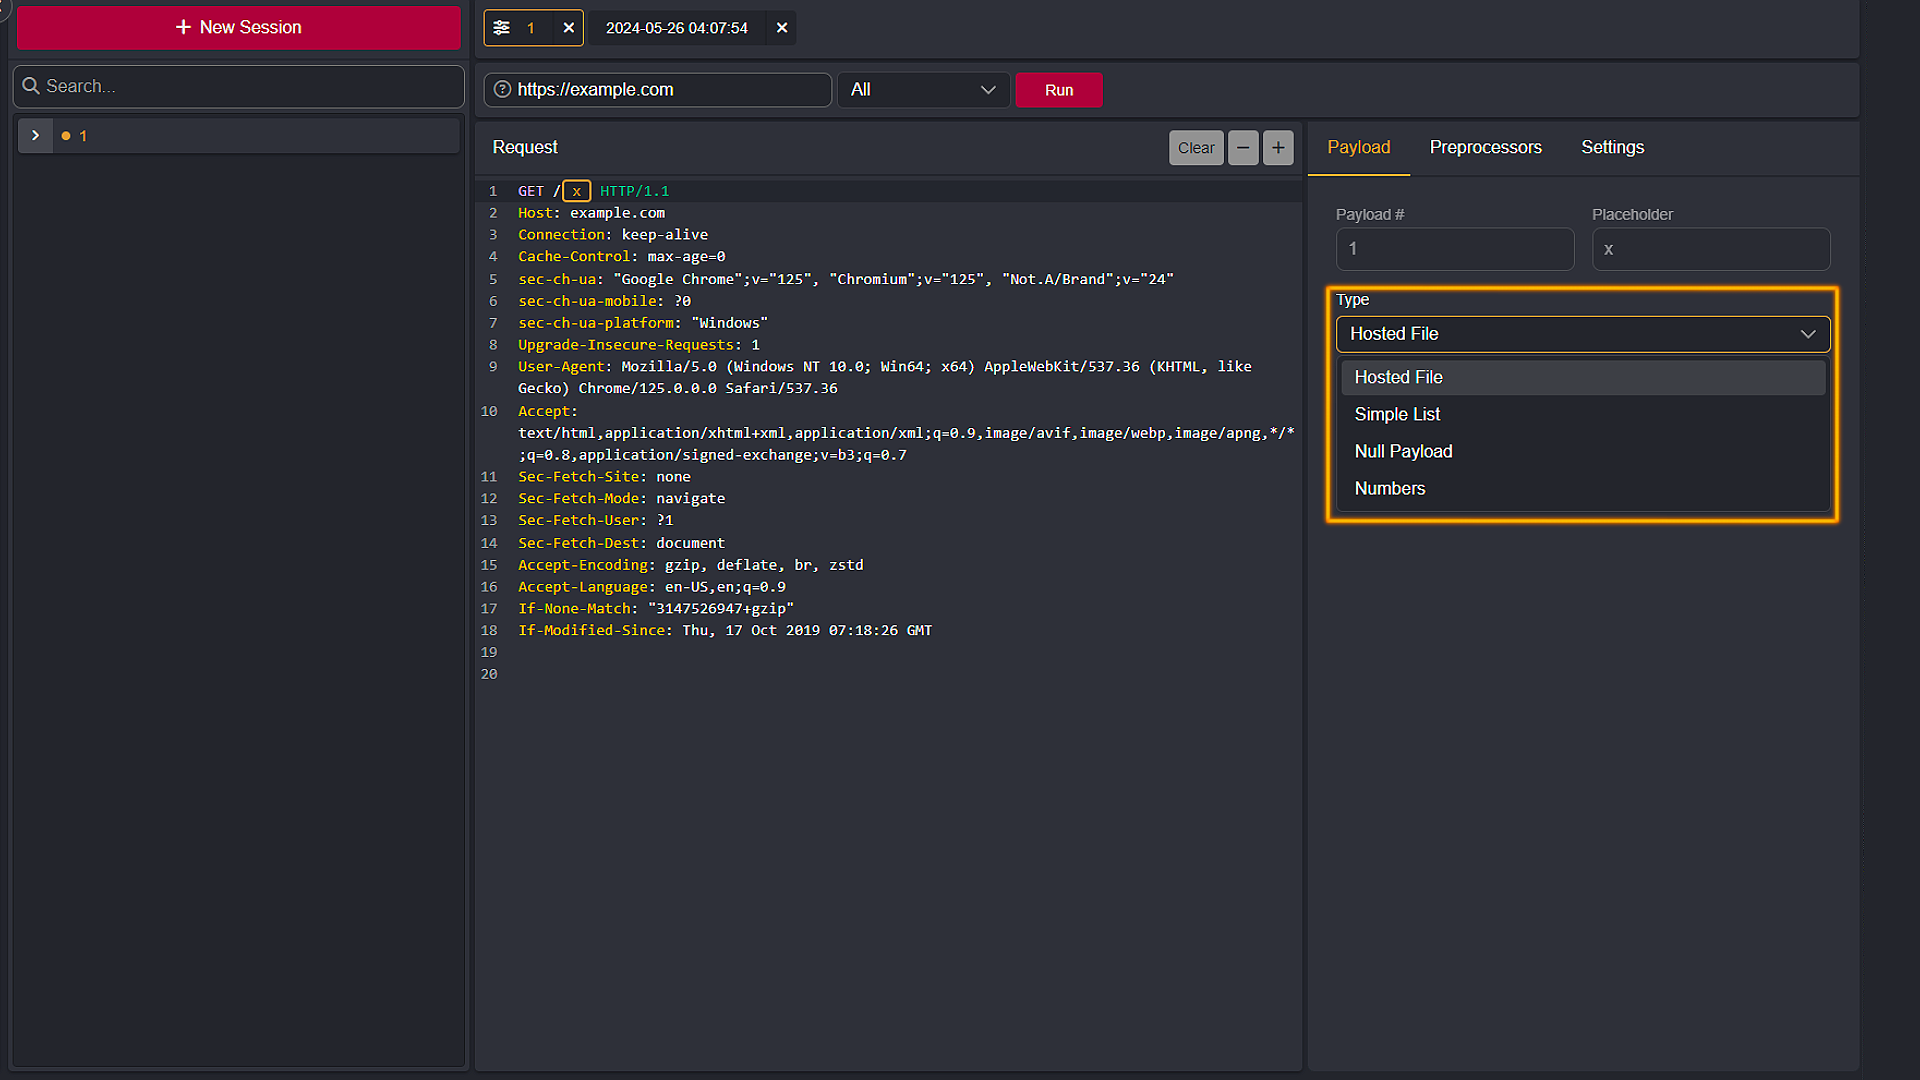
- Hosted File: Allows you to select one of the files you had previously uploaded to the Caido Instance. View the Uploading Files for Use in Automate Quickstart Guide for more information.
- Simple List: For cases where you want to test a short manually created list of elements.
- Null Payload: Generate requests without changing anything in it.
- Numbers: Generates a range of specified integers to use as a payload.
Preprocessors
Preprocessors enable you to apply additional modifications to the payloads.
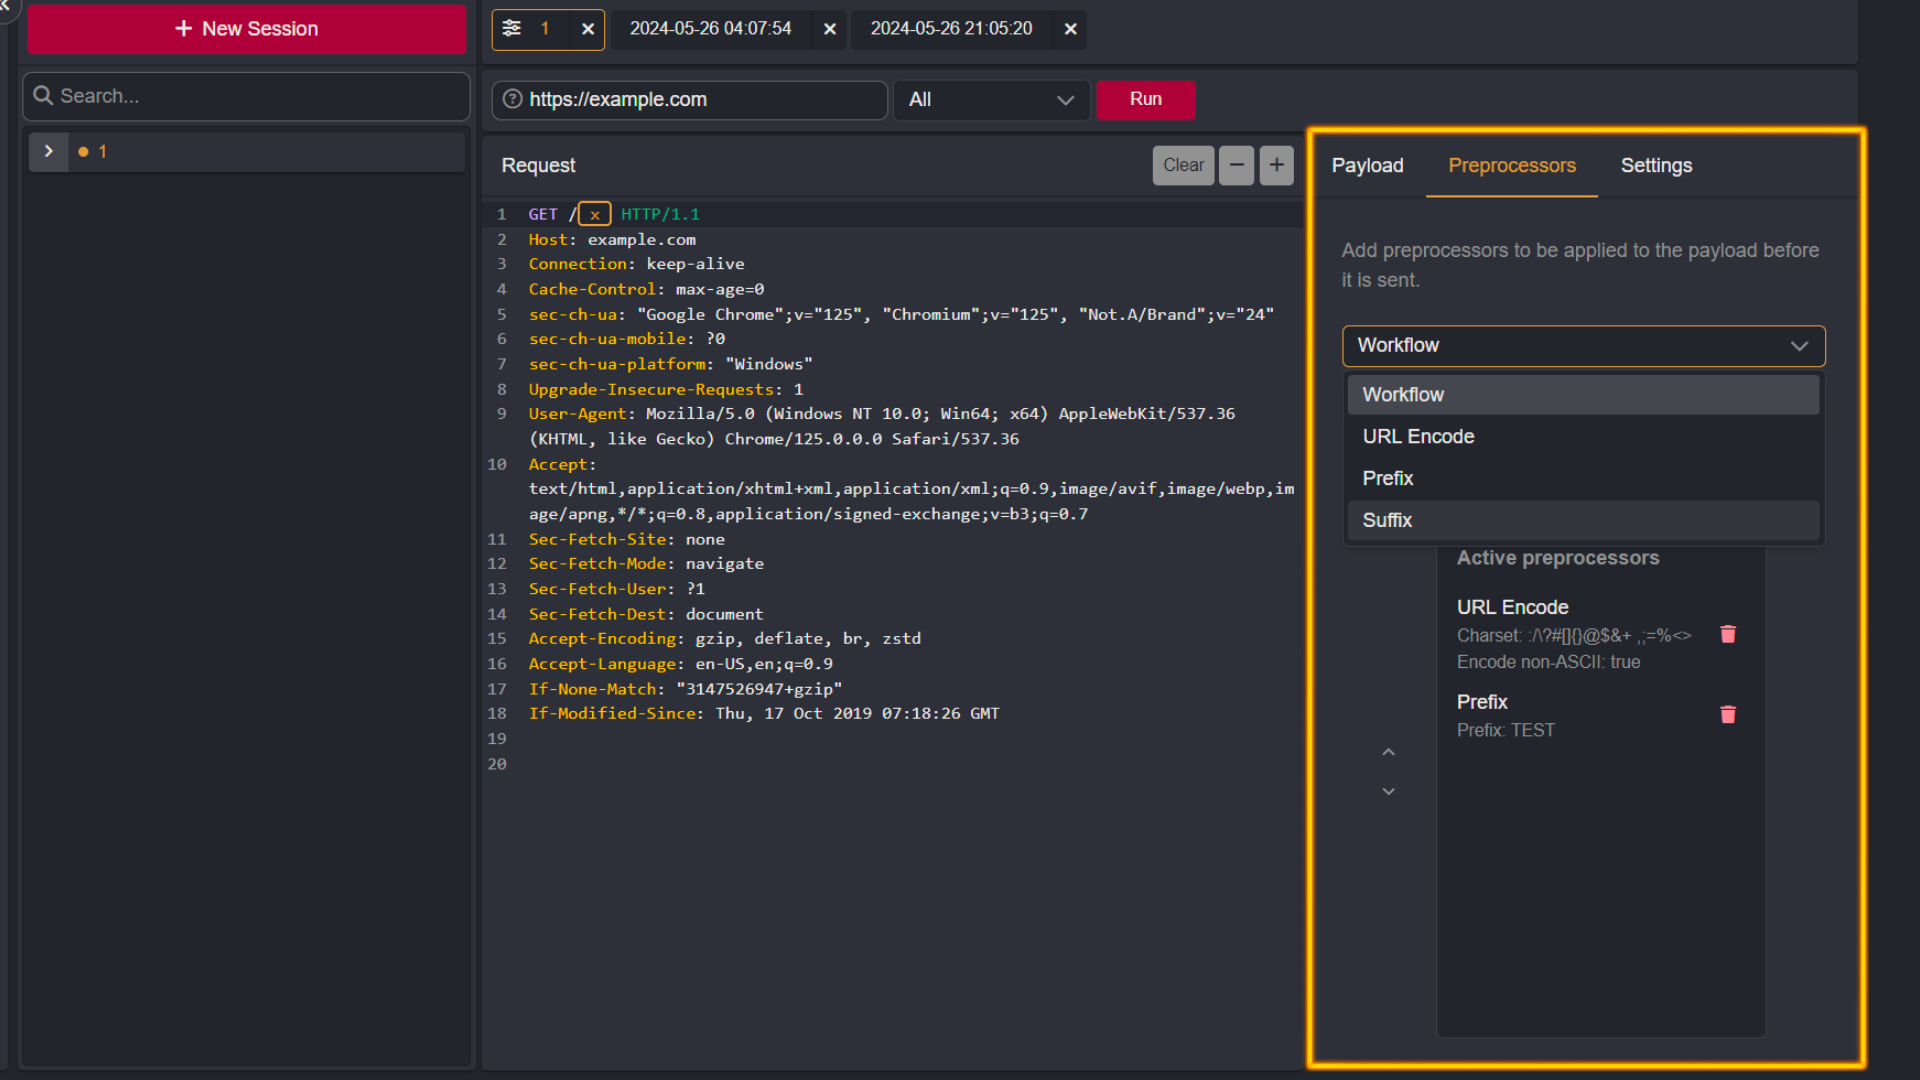
- Workflow: Select a default or custom made Workflow to apply to the requests that will be sent in your campaign. View the Workflow documentation for more information.
- URL Encode: This option includes an input bar in which you can supply characters to URL encode before the requests of your campaign are sent. There is also a checkbox to toggle between encoding/not encoding non-ASCII characters.
- Prefix: Allows you to prefix a payload value with a supplied value.
- Suffix: Allows you to append a supplied suffix value to a payload value.
⚡PRO FEATURE
Workflow Preprocessors are only available to Caido Pro users.
Settings
Additional setting options allow you to fine tune how the Automate session will run.
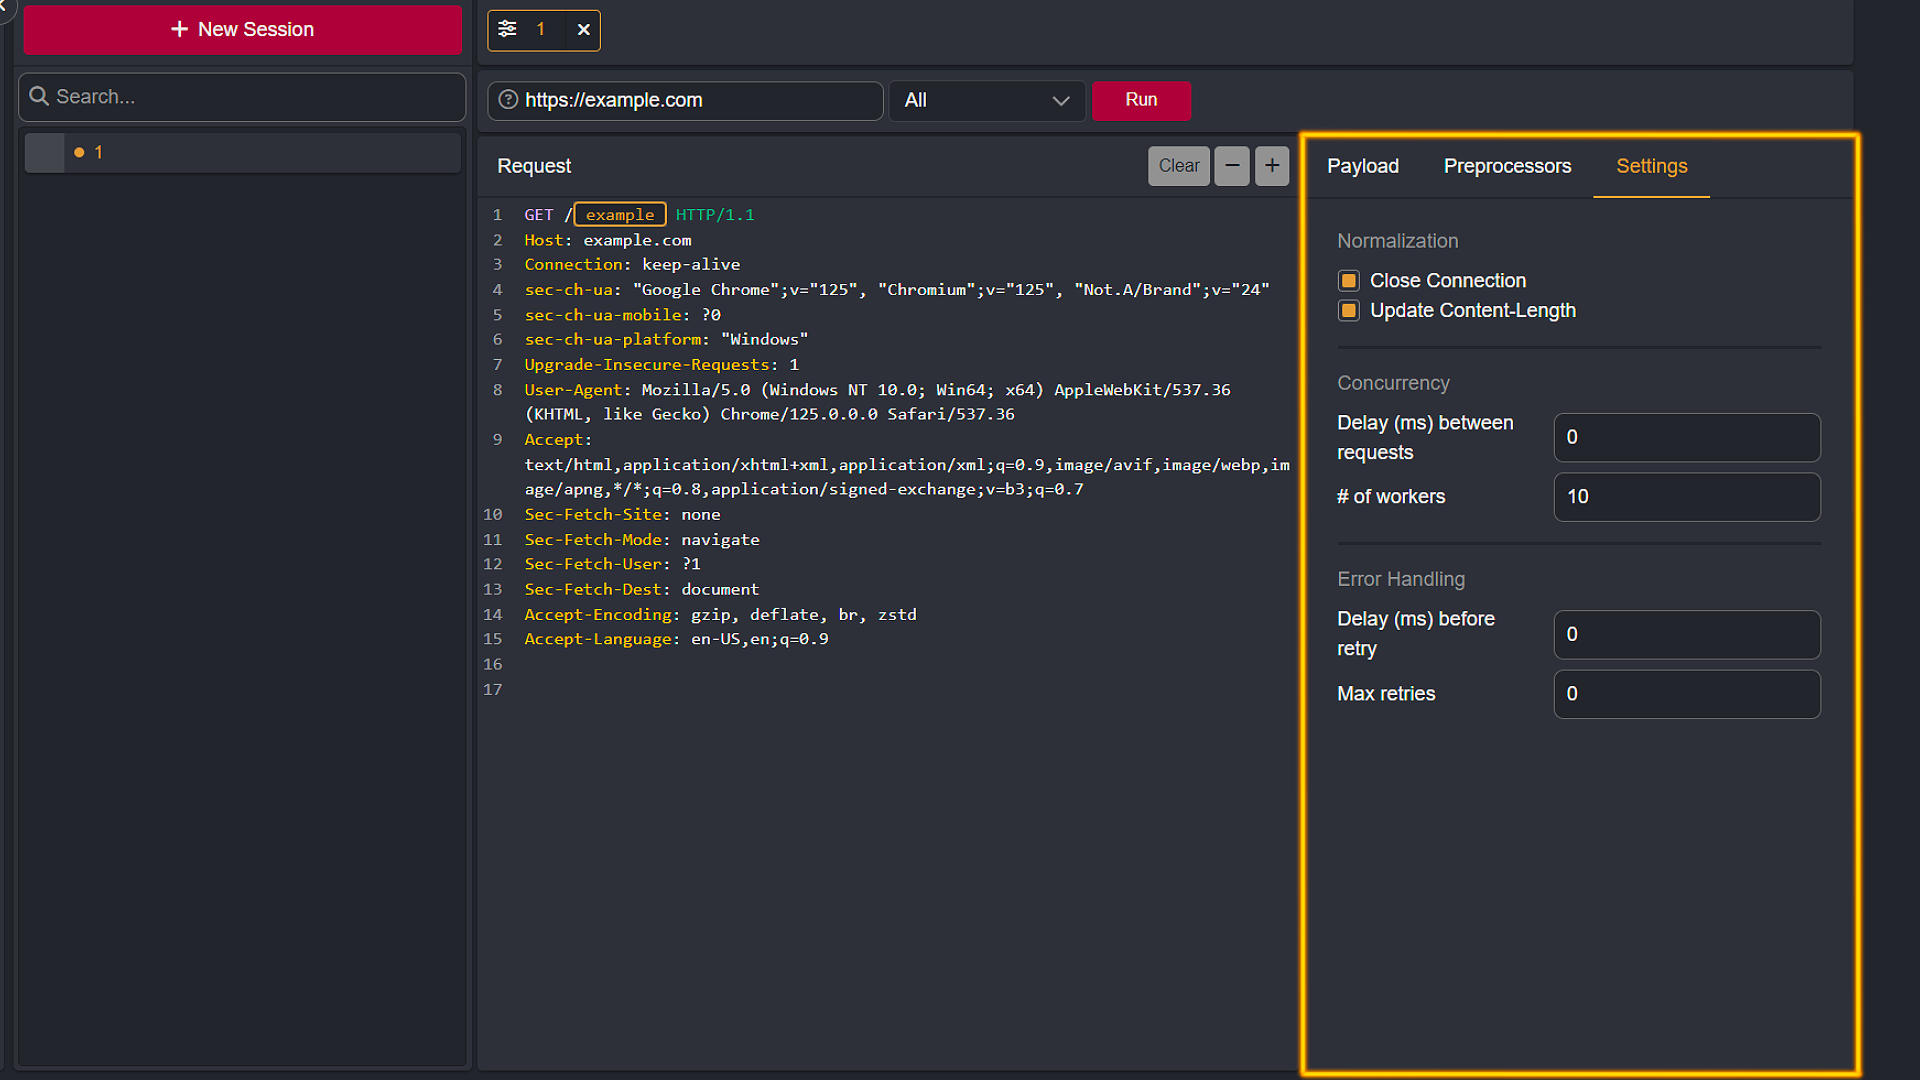
- Close Connection: Toggle between keeping the socket connection or closing the socket connection after the paired response to a request is received.
- Update Content-Length: Automatically update the value of the Content-Length header to account for the payload.
- Delay (ms) between requests: The time in milliseconds to sleep between forwarding requests.
- # of workers: The number of threads to run.
- Delay (ms) before retry: The time in milliseconds to sleep until retrying a failed request.
- Max retries: The number of reattempts to perform upon a failed request before moving on to the following requests.