Creating Your First Project
What are Projects?
For advanced documentation on this topic, view the Projects guide.
Caido utilizes a client-server architecture model. An Instance of Caido is essentially an installation.
Think of Projects as separate directories for your audits. Projects allow you to stay organized when testing against multiple targets within the same Caido instance.
Creating a New Project
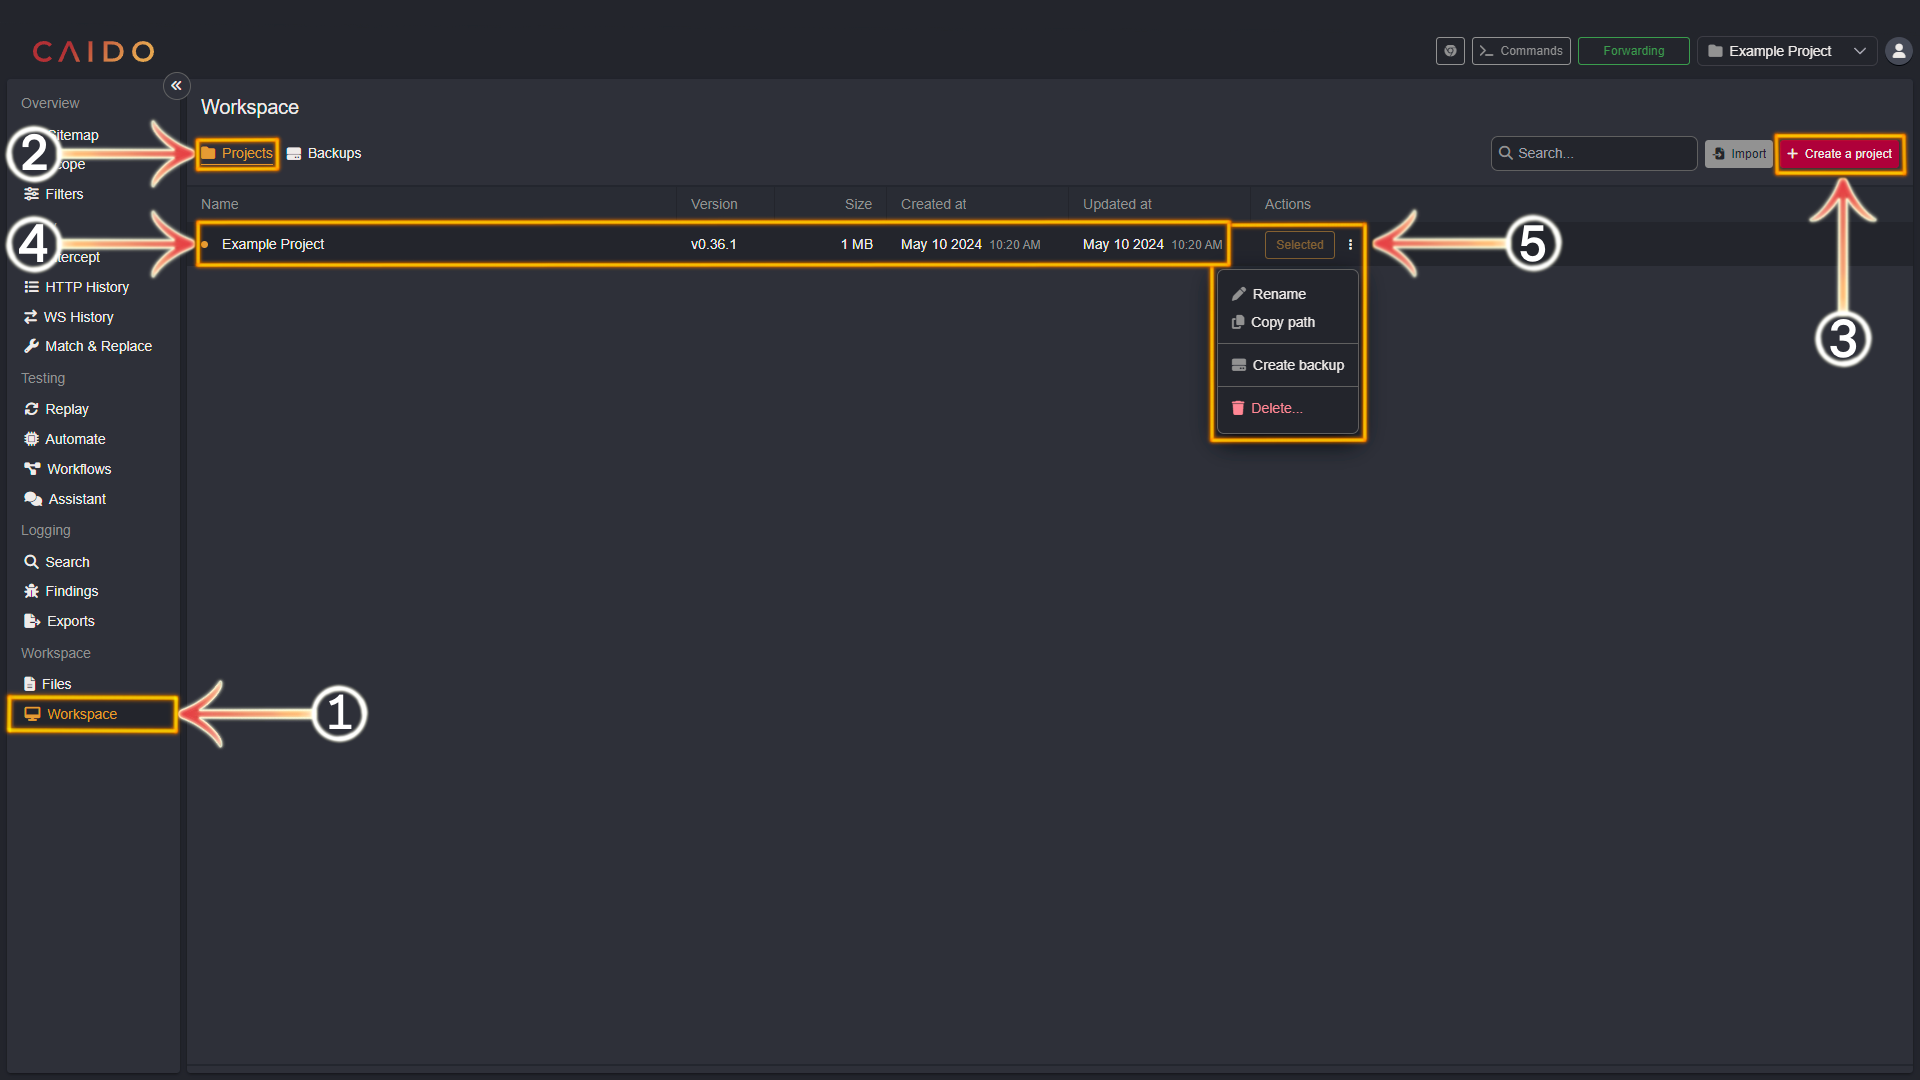
- Select the
Workspacetab from the left-hand menu within the Caido window. - Ensure the
Projectstab in the top-left area of the Caido window is selected. - Click on the red
+ Create a projectbutton in the top-right area of the Caido window. Name the Project - consider using a descriptive name of the context the Project will be utilized for (such as the name of the client you are auditing, a specific bug bounty program, the name of the product, etc.). Once you have entered a name - click on theCreatebutton. - Your new Project will now appear in the
Workspacepanel. - Clicking on
⋮will present the following additional options:
- Rename: Rename your Project.
- Copy path: Copy the Project's data location on your device to your clipboard.
- Create backup (Caido Pro Feature): Create a Backup of the Project data.
- Delete: Delete the Project from your Instance.
Switching Between Projects
Caido offers the ability to switch between your Projects with ease. Switching Projects can be accomplished in two different ways:
- Selecting the
Workspacetab from the left-hand menu within the Caido window and clicking theSelectbutton next to the desired Project. - Selecting the desired Project in the drop-down menu, located in the upper-right corner of the Caido window.
Capturing and Inspecting Web Traffic
Once you have familiarized yourself with creating Projects - basic capture and inspection of web traffic steps are available here: