Using a Caido MCP Server
In this tutorial, you will learn how to integrate a Caido MCP Server to be used with Cursor and Claude Code.
Caido MCP Server
The community developed Caido MCP Server provides AI models/agents with a variety of tools and controlled access to project data.
WARNING
The Caido MCP Server is not officially affiliated with Caido.
As with any third-party projects, ensure to review the code and assess the potential security risks before installation and execution.
With contextual awareness of a project's proxied traffic, extensions, and configurations - the Caido MCP Server gives you the ability to instruct AI assistants to:
- Intercept and forward traffic.
- Filter traffic with HTTPQL query statements.
- Send requests via Replay.
- List Automate and Replay sessions.
- Obtain request/response data.
- Create and list findings and scope presets.
- Discover the recorded endpoints in the Sitemap.
- List and switch between projects.
- List workflows and filter presets.
View a complete list of the individual tools.
Installation
To install the Caido MCP Server:
- Clone the repository.
git clone --branch v1.1.0 https://github.com/c0tton-fluff/caido-mcp-server.git- Navigate into the root directory.
cd caido-mcp-server- Compile the server.
go build -o caido-mcp-server .go build -o caido-mcp-server.exe .View alternative installation methods.
Configuration
Once the server is installed, to connect it to Caido:
Launch Caido.
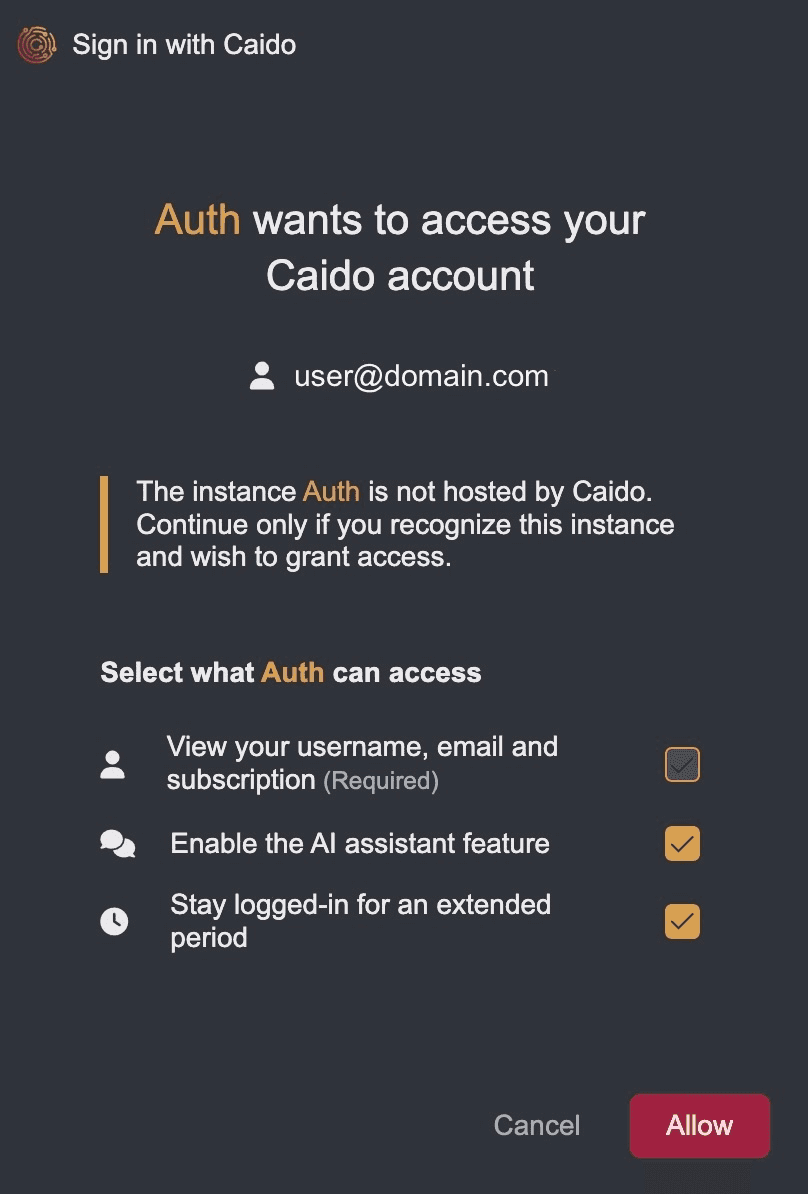
Execute the
logincommand with the listening address of the Caido instance as the value of the-uargument.
caido-mcp-server login -u http://127.0.0.1:8080caido-mcp-server.exe login -u http://127.0.0.1:8080- Click on the
Allowbutton to authorize the server.
Configuring an MCP Client
Once the server is installed, configured, and you are authenticated, models/agents can be configured as clients.
Cursor
To use the Caido MCP Server with the Cursor desktop application:
- Create a
~/.cursor/mcp.jsonfile with the following content (ensure to replace the value of thecommandkey with the path location of yourcaido-mcp-serverbinary).
{
  "mcpServers": {
    "caido": {
      "command": "/Users/ninjeeter/caido-mcp-server/caido-mcp-server",
      "args": ["serve"],
      "env": {
        "CAIDO_URL": "http://127.0.0.1:8080"
      }
    }
  }
}{
"mcpServers": {
"caido": {
"command": "C:\\Users\\ninje\\caido-mcp-server\\caido-mcp-server.exe",
"args": ["serve"],
"env": {
"CAIDO_URL": "http://127.0.0.1:8080"
}
}
}
}Ensure Caido is running and listening at the same address as the value of the
CAIDO_URLenvironment variable (e.g.http://127.0.0.1:8080).Restart Cursor (or click on View in the navigation bar, select Command Palette..., and select Developer: Reload Window).
TIP
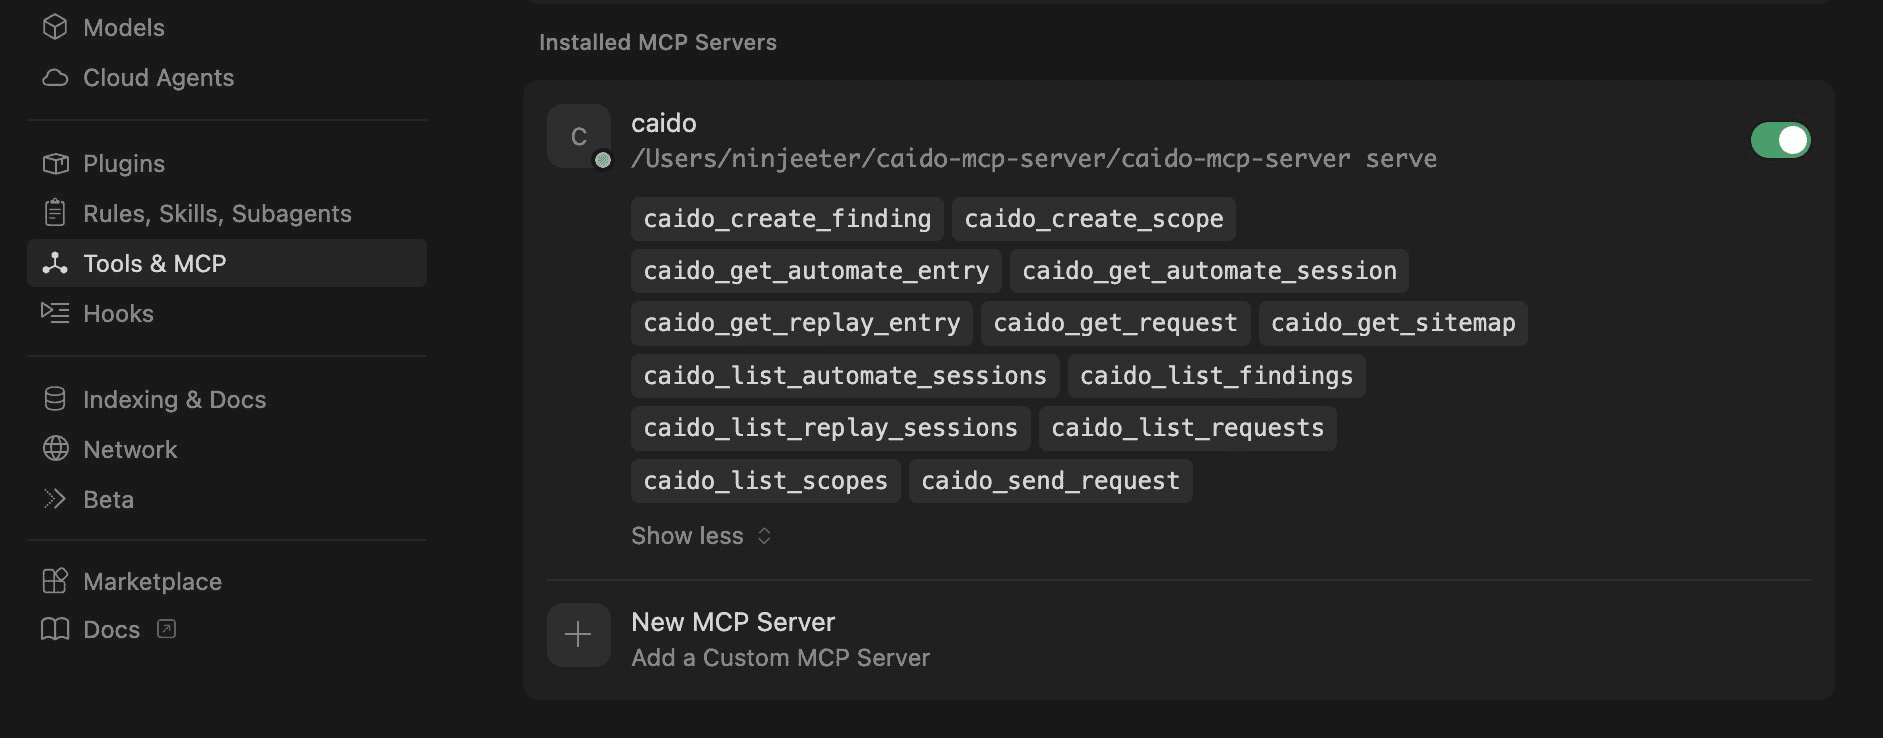
To verify the configuration, click on the button to access the Cursor Settings and select Tools & MCP.
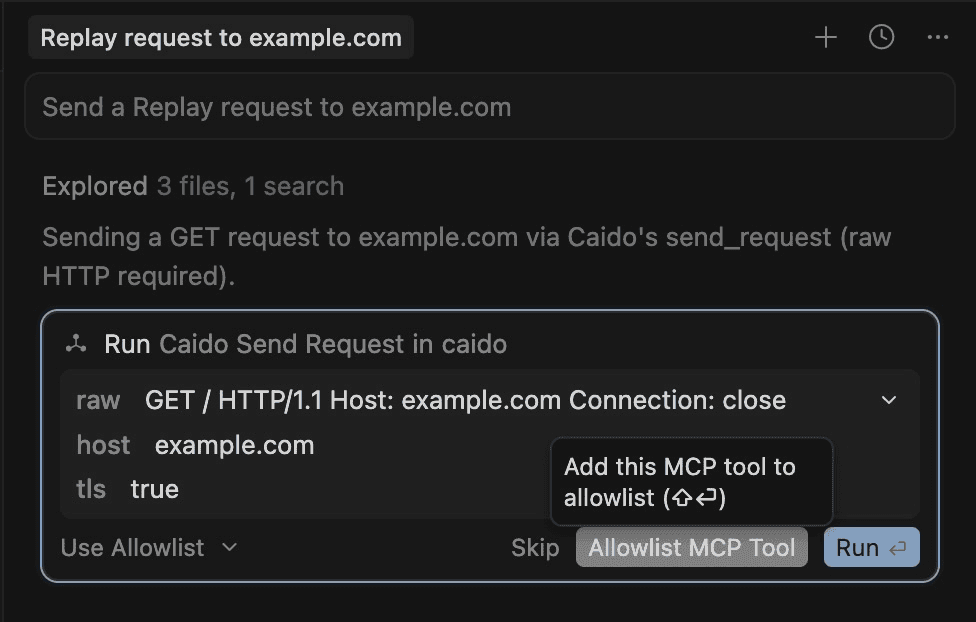
Click on the
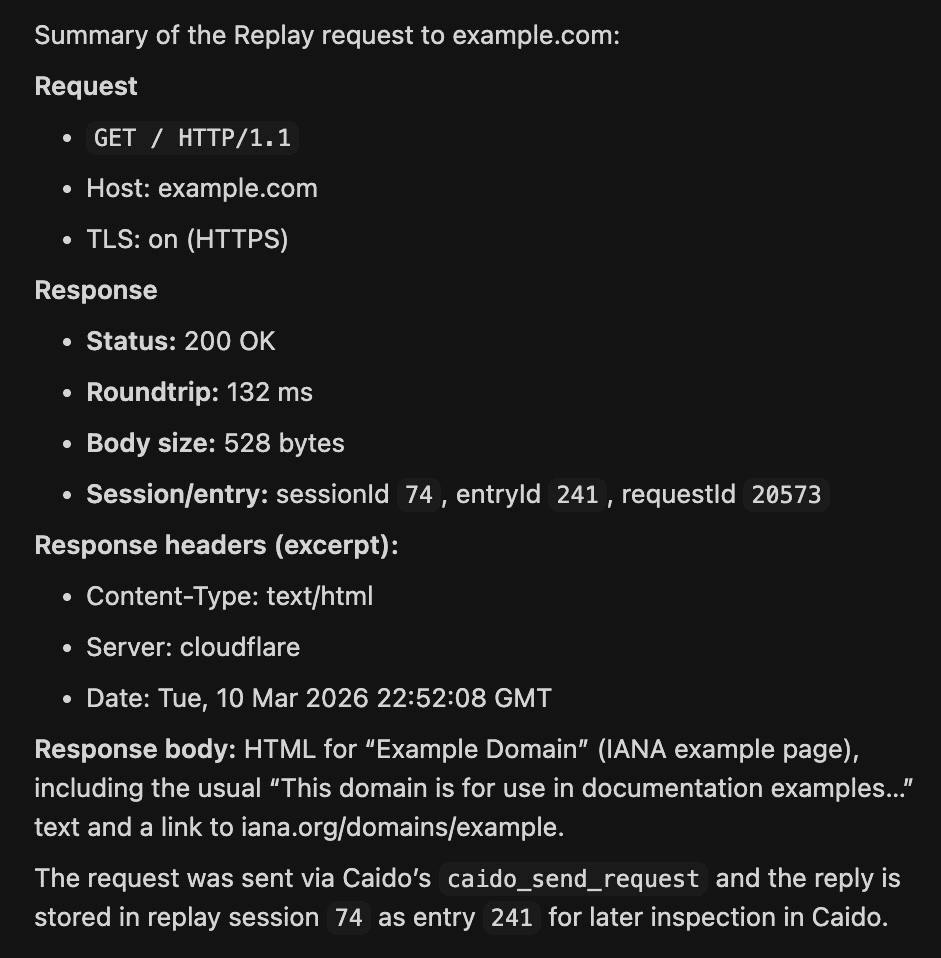
+ New Chatbutton.To verify the connection, submit the message "Send a Replay request to example.com".
WARNING
Consider the reduction in oversight before selecting Allowlist MCP Tool.
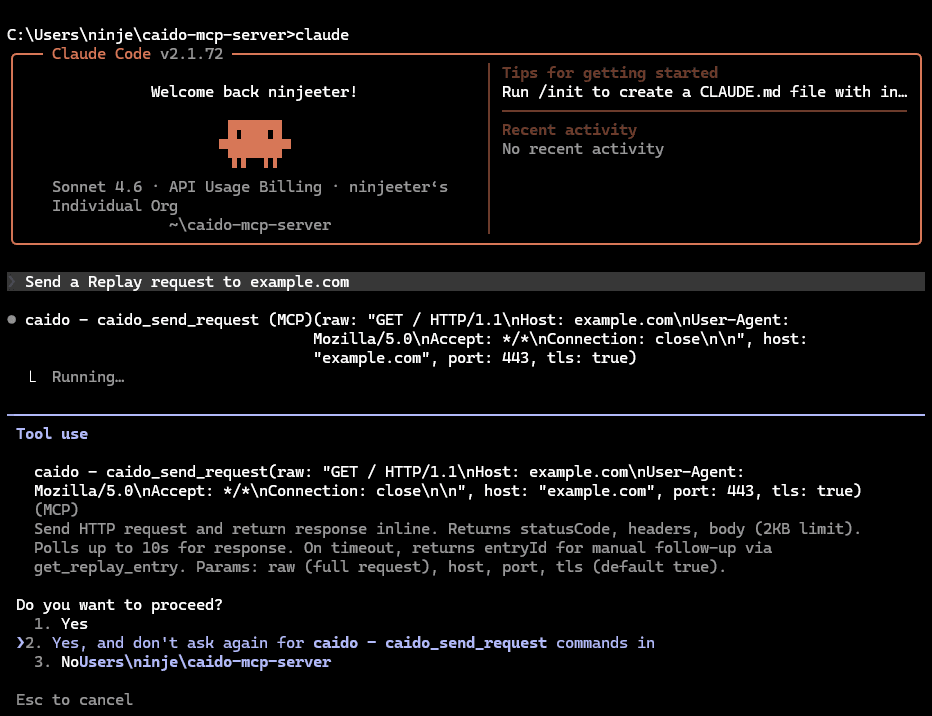
A new Replay session will be created and a summary of the request and response will be returned.
Claude CLI
To use the Caido MCP Server with the Claude CLI tool:
- In the configuration object of the
~/.claude.jsonfile, add the followingmcpServersobject as a field (ensure to replace the value of thecommandkey with the path location of yourcaido-mcp-serverbinary).
"mcpServers": {
  "caido": {
    "type": "stdio",
    "command": "/Users/ninjeeter/caido-mcp-server/caido-mcp-server",
    "args": ["serve"],
    "env": {
      "CAIDO_URL": "http://127.0.0.1:8080"
    }
  }
}"mcpServers": {
"caido": {
"type": "stdio",
"command": "C:\\Users\\ninje\\caido-mcp-server\\caido-mcp-server.exe",
"args": ["serve"],
"env": {
"CAIDO_URL": "http://127.0.0.1:8080"
}
}
}Save the changes to
.claude.json.Start a Claude session.
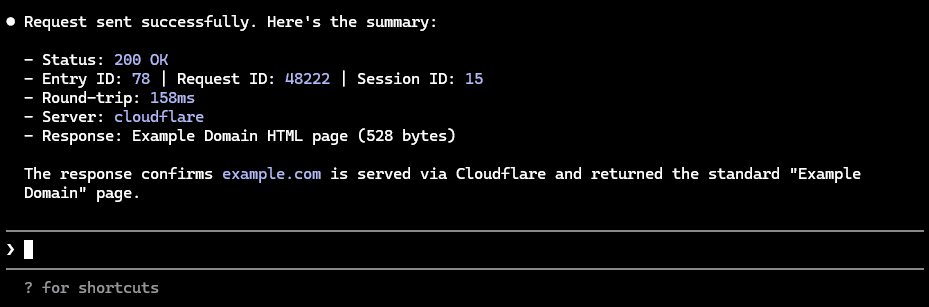
claude- To verify the connection, submit the message "Send a Replay request to example.com".
WARNING
Consider the reduction in oversight before selecting 2. Yes, and don't ask again for caido - caido_send_request commands in....
A new Replay session will be created and a summary of the request and response will be returned.